
It's no surprise that probably the largest files on your Mac are videos. So whether you're low on hard drive space or trying to send a movie file that's too large, compressing your video is a great way to reduce file size. With so many options to choose from, figuring out where to start can feel overwhelming. But don’t worry, this article will explain to you in detail how video compression works and how to compress videos on Mac.
What is compression and how does it work?
Before we dive into how to compress video on Mac, it’s crucial to understand the basic concepts of compression and how it works. Simply put, video compression is the process of reducing the file size by reducing the amount of data in a video file. Since video is actually made up of a series of images (frames) played in rapid succession, video compression has similarities to image compression. During the compression process, data that has little impact on the visual experience is removed, thereby reducing the overall file size.
Is it possible to compress video without significantly reducing quality?
When compressing video on Mac, a key question is how to reduce file size while maintaining video quality. In fact, this is a balancing process. Because even slight compression will cause a loss of video quality to a certain extent. Therefore, you need to find a balance that reduces the file size as much as possible without affecting the video quality too much.
The best free video compressor
While Apple's default apps are great and easy to use, they do leave little room for controlling compression settings. So if you want to further adjust the compression levels, dive into the Siovue app, here is a complete tutorial on how to use the Siovue video compression tool
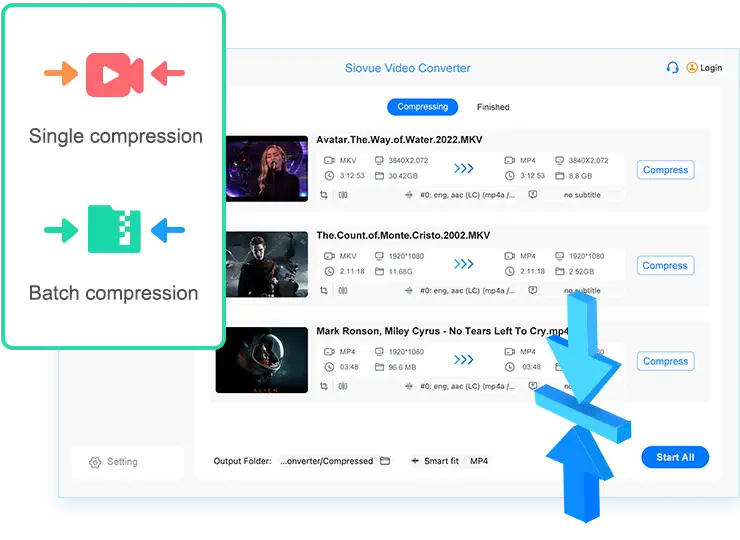
How to compress video on Mac
Open the Siovue video compression software of choice
Import the video files you want to compress: In the software interface, find and click the "Import" or "Add Files" or similar button, and then select the video files you want to compress from your Mac. Some software also supports batch import and compression, which can greatly improve processing efficiency.
Adjust compression settings as needed: This is the most critical step in the compression process. You can adjust parameters such as resolution, bit rate, and encoding format as needed. Typically, lowering the resolution and bitrate can significantly reduce file size, but may also result in a loss of video quality. Therefore, you need to find a balance between file size and video quality.
Start compression and wait for the process to complete: After setting the parameters, click the "Start Compression" or similar button and the software will start compressing the video. The compression process may take some time, depending on the size of the video and the performance of your computer.
Save compressed video files: After the compression is completed, the software usually saves the compressed video files automatically. You can find it in the software's output folder or in the save location you specify.
Summarize
Compressing videos on Mac is an effective way to save hard drive space. By using free video compression tools for macOS or Siovue, you can easily reduce the size of your video files while maintaining video quality. During the compression process, pay attention to balancing file size and video quality to find the settings that work best for you. I hope this article provides you with useful guidance on compressing videos on Mac.