Installation
1. Download the latest version DMG installation package of VueSpot from the Siovue official website.
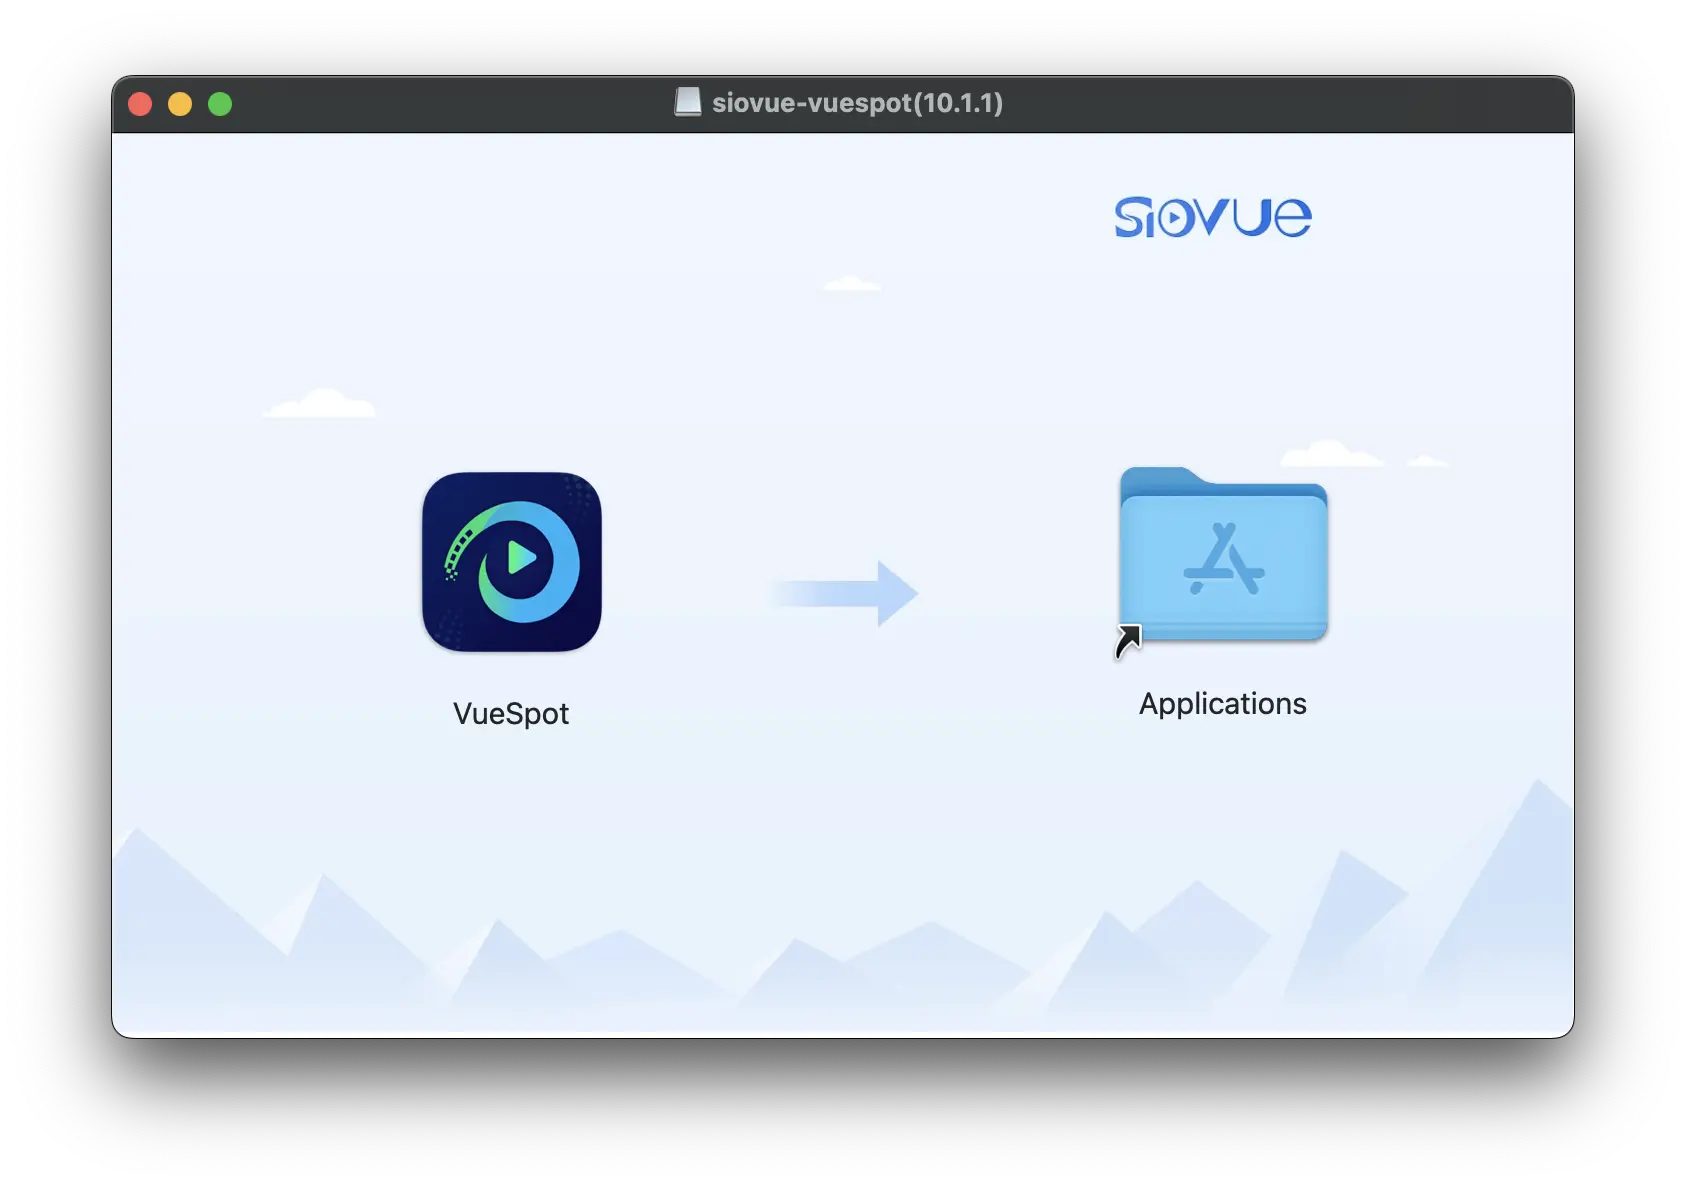
2. Find and double-click to open the DMG installation package. In the opened DMG package window, drag VueSpot to the Applications folder. A copy progress will appear; wait for the copying to complete.
3. Open Launchpad, find VueSpot, and click the VueSpot icon to open VueSpot.
Welcome Window
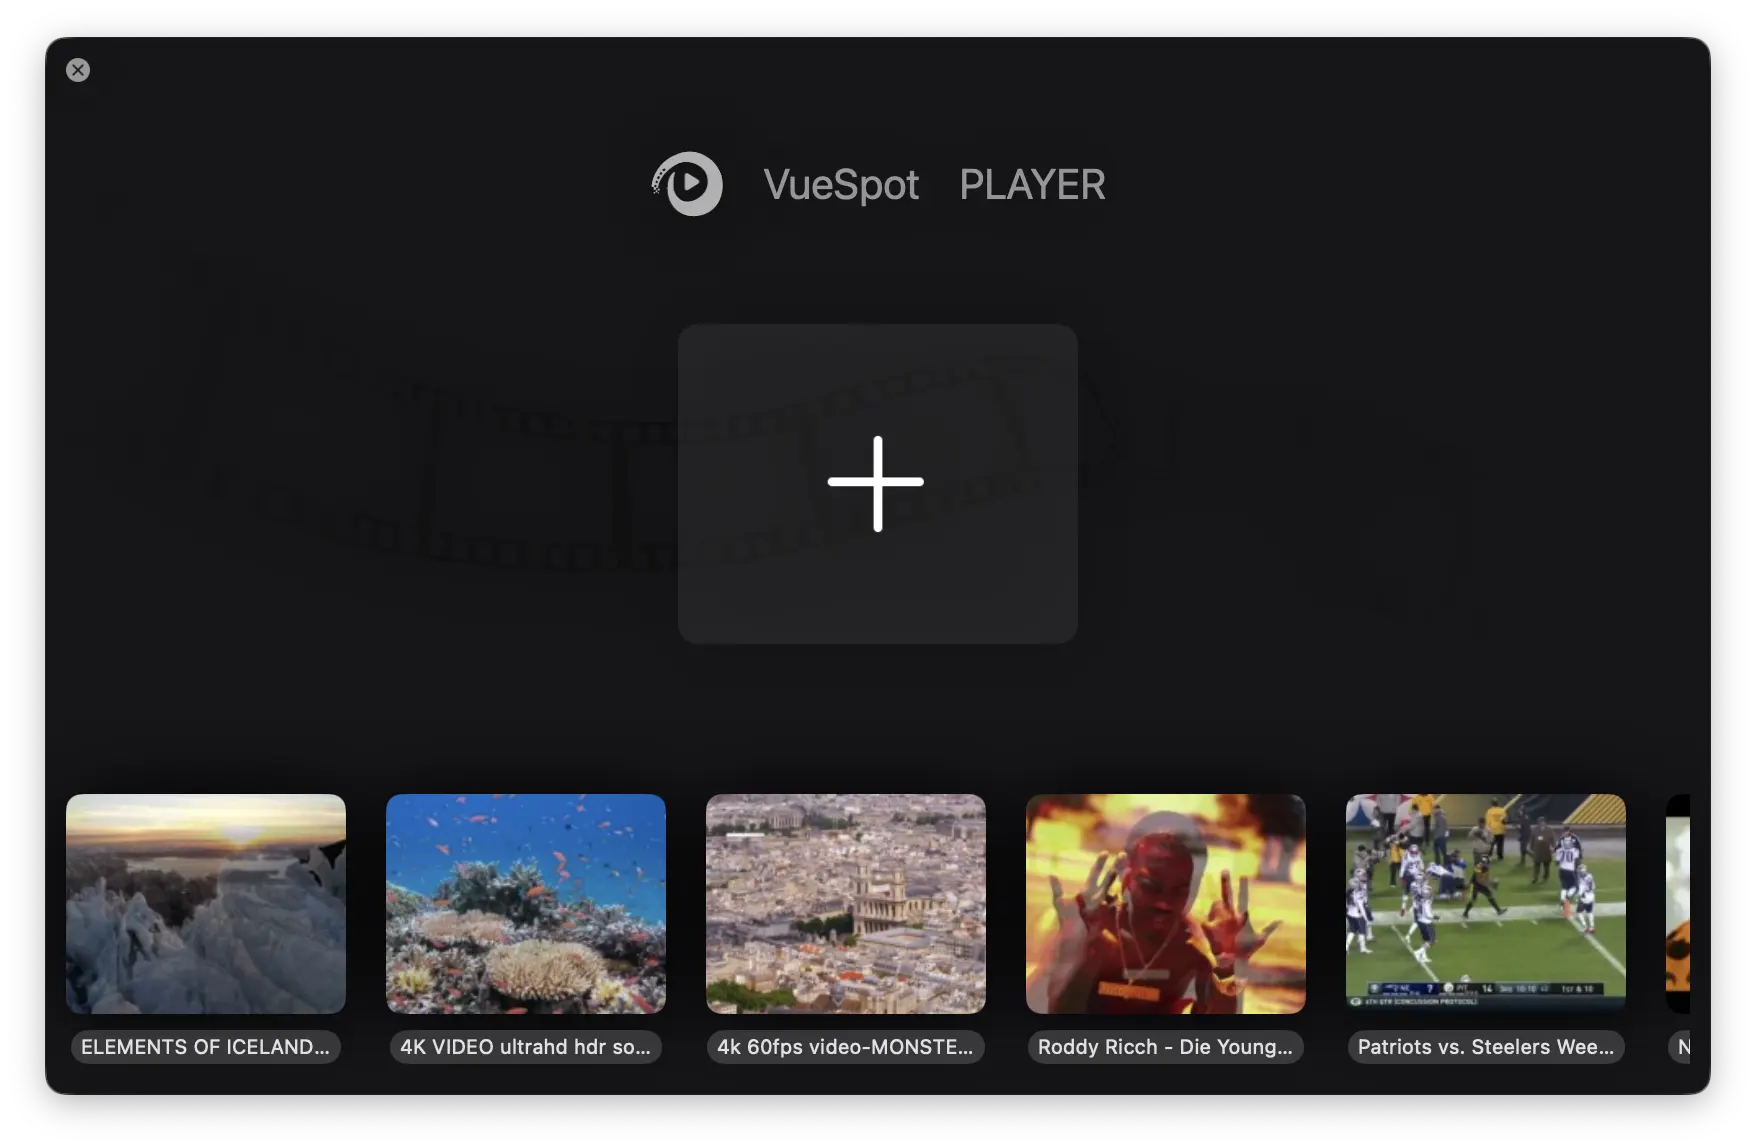
1. After opening VueSpot, a welcome window will be displayed.
2. Click the ‘+’ button in the middle or drag and drop files onto the interface to play them.
3. At the bottom is a list of recently played files. Click on a video thumbnail to resume playback from the last position.
Playing Files
Multiple convenient ways to add files.
1. Drag and drop files into the startup window.
2. Drag and drop files into the playback window.
3. Drag and drop files onto the VueSpot icon in the Dock.
4. Click the + button in the startup window to select multiple files or folders in Finder.
5. Click on the “Open in new window…” in the File menu.
Quick Settings Panel
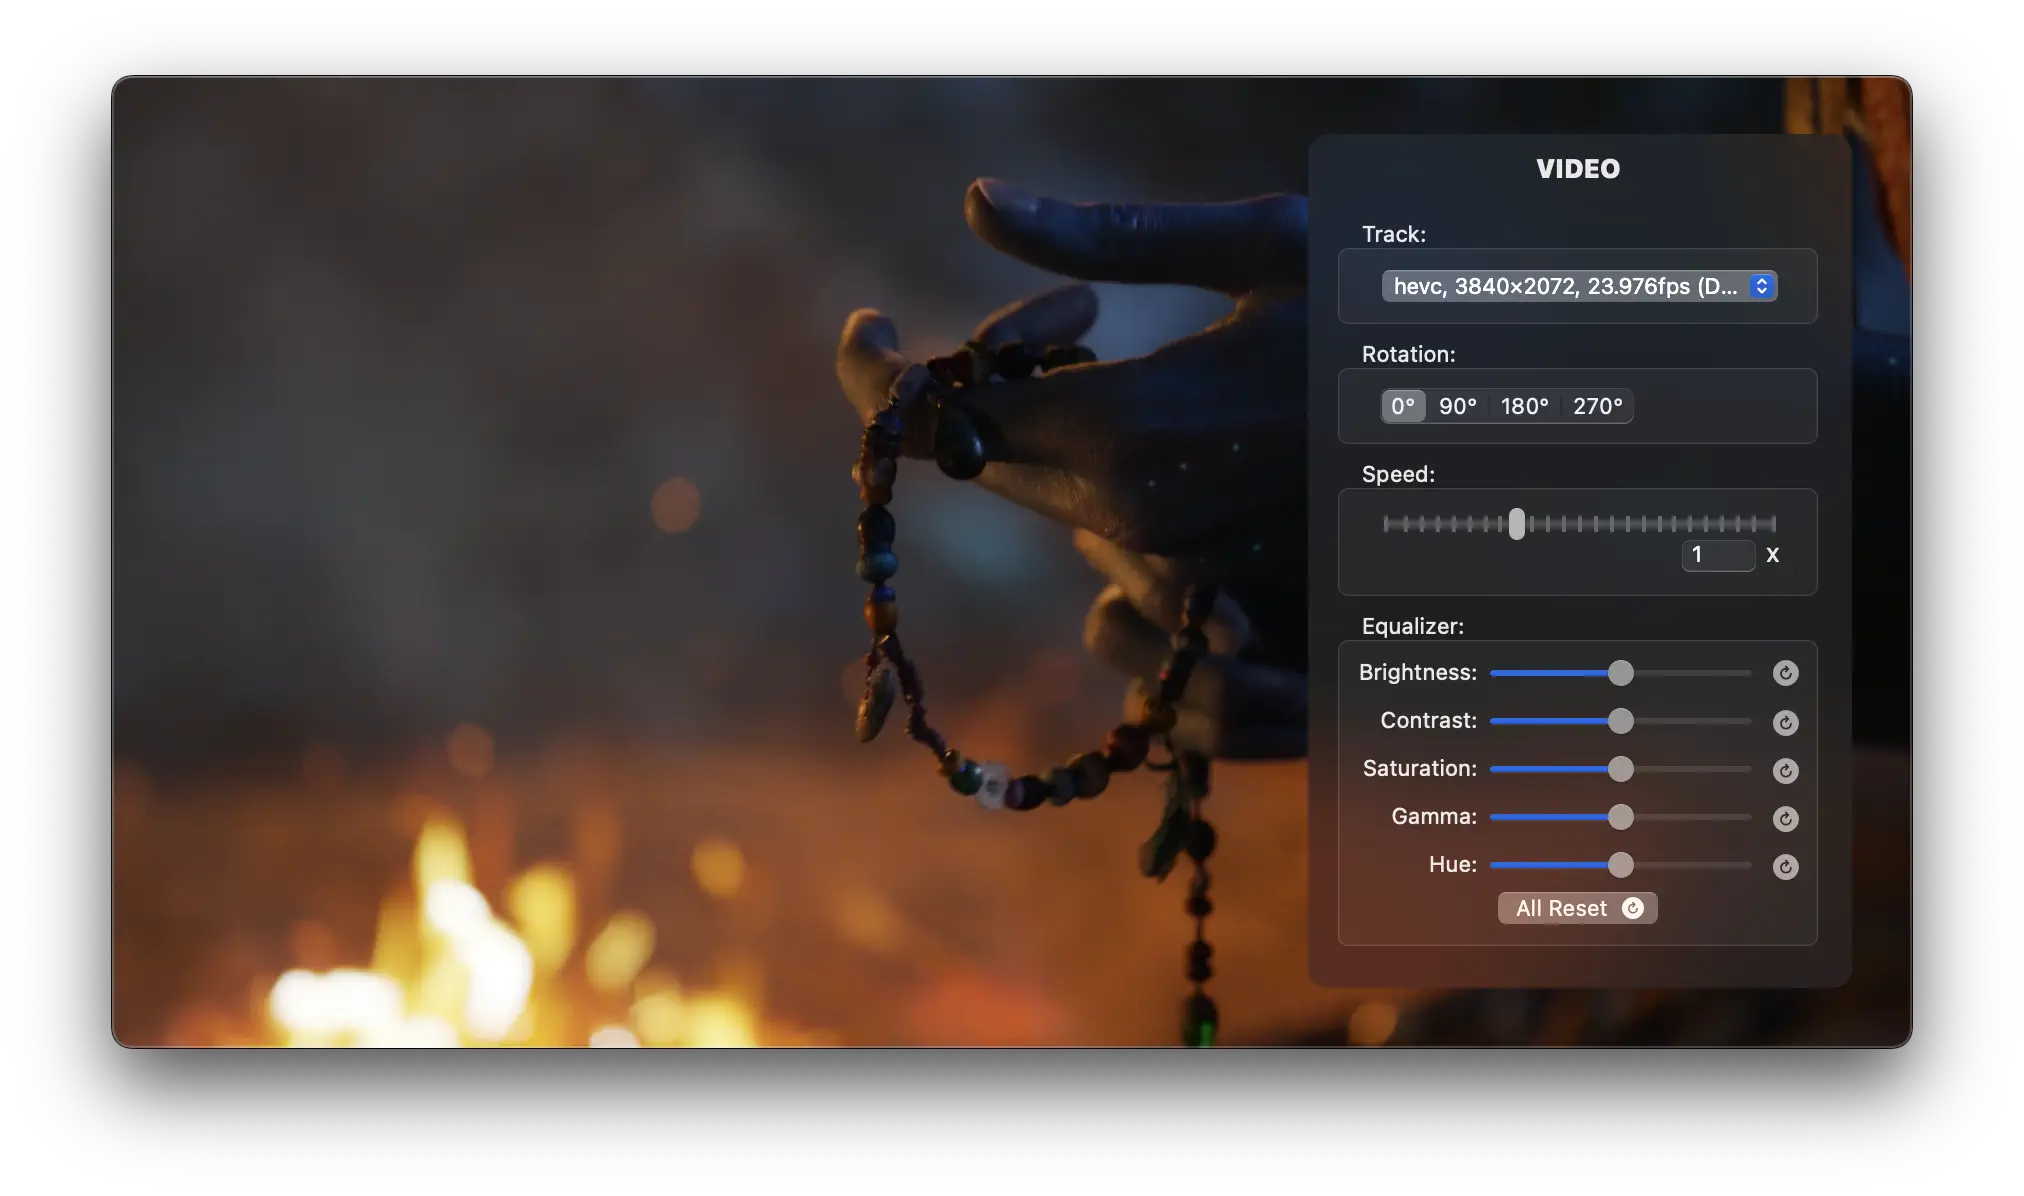
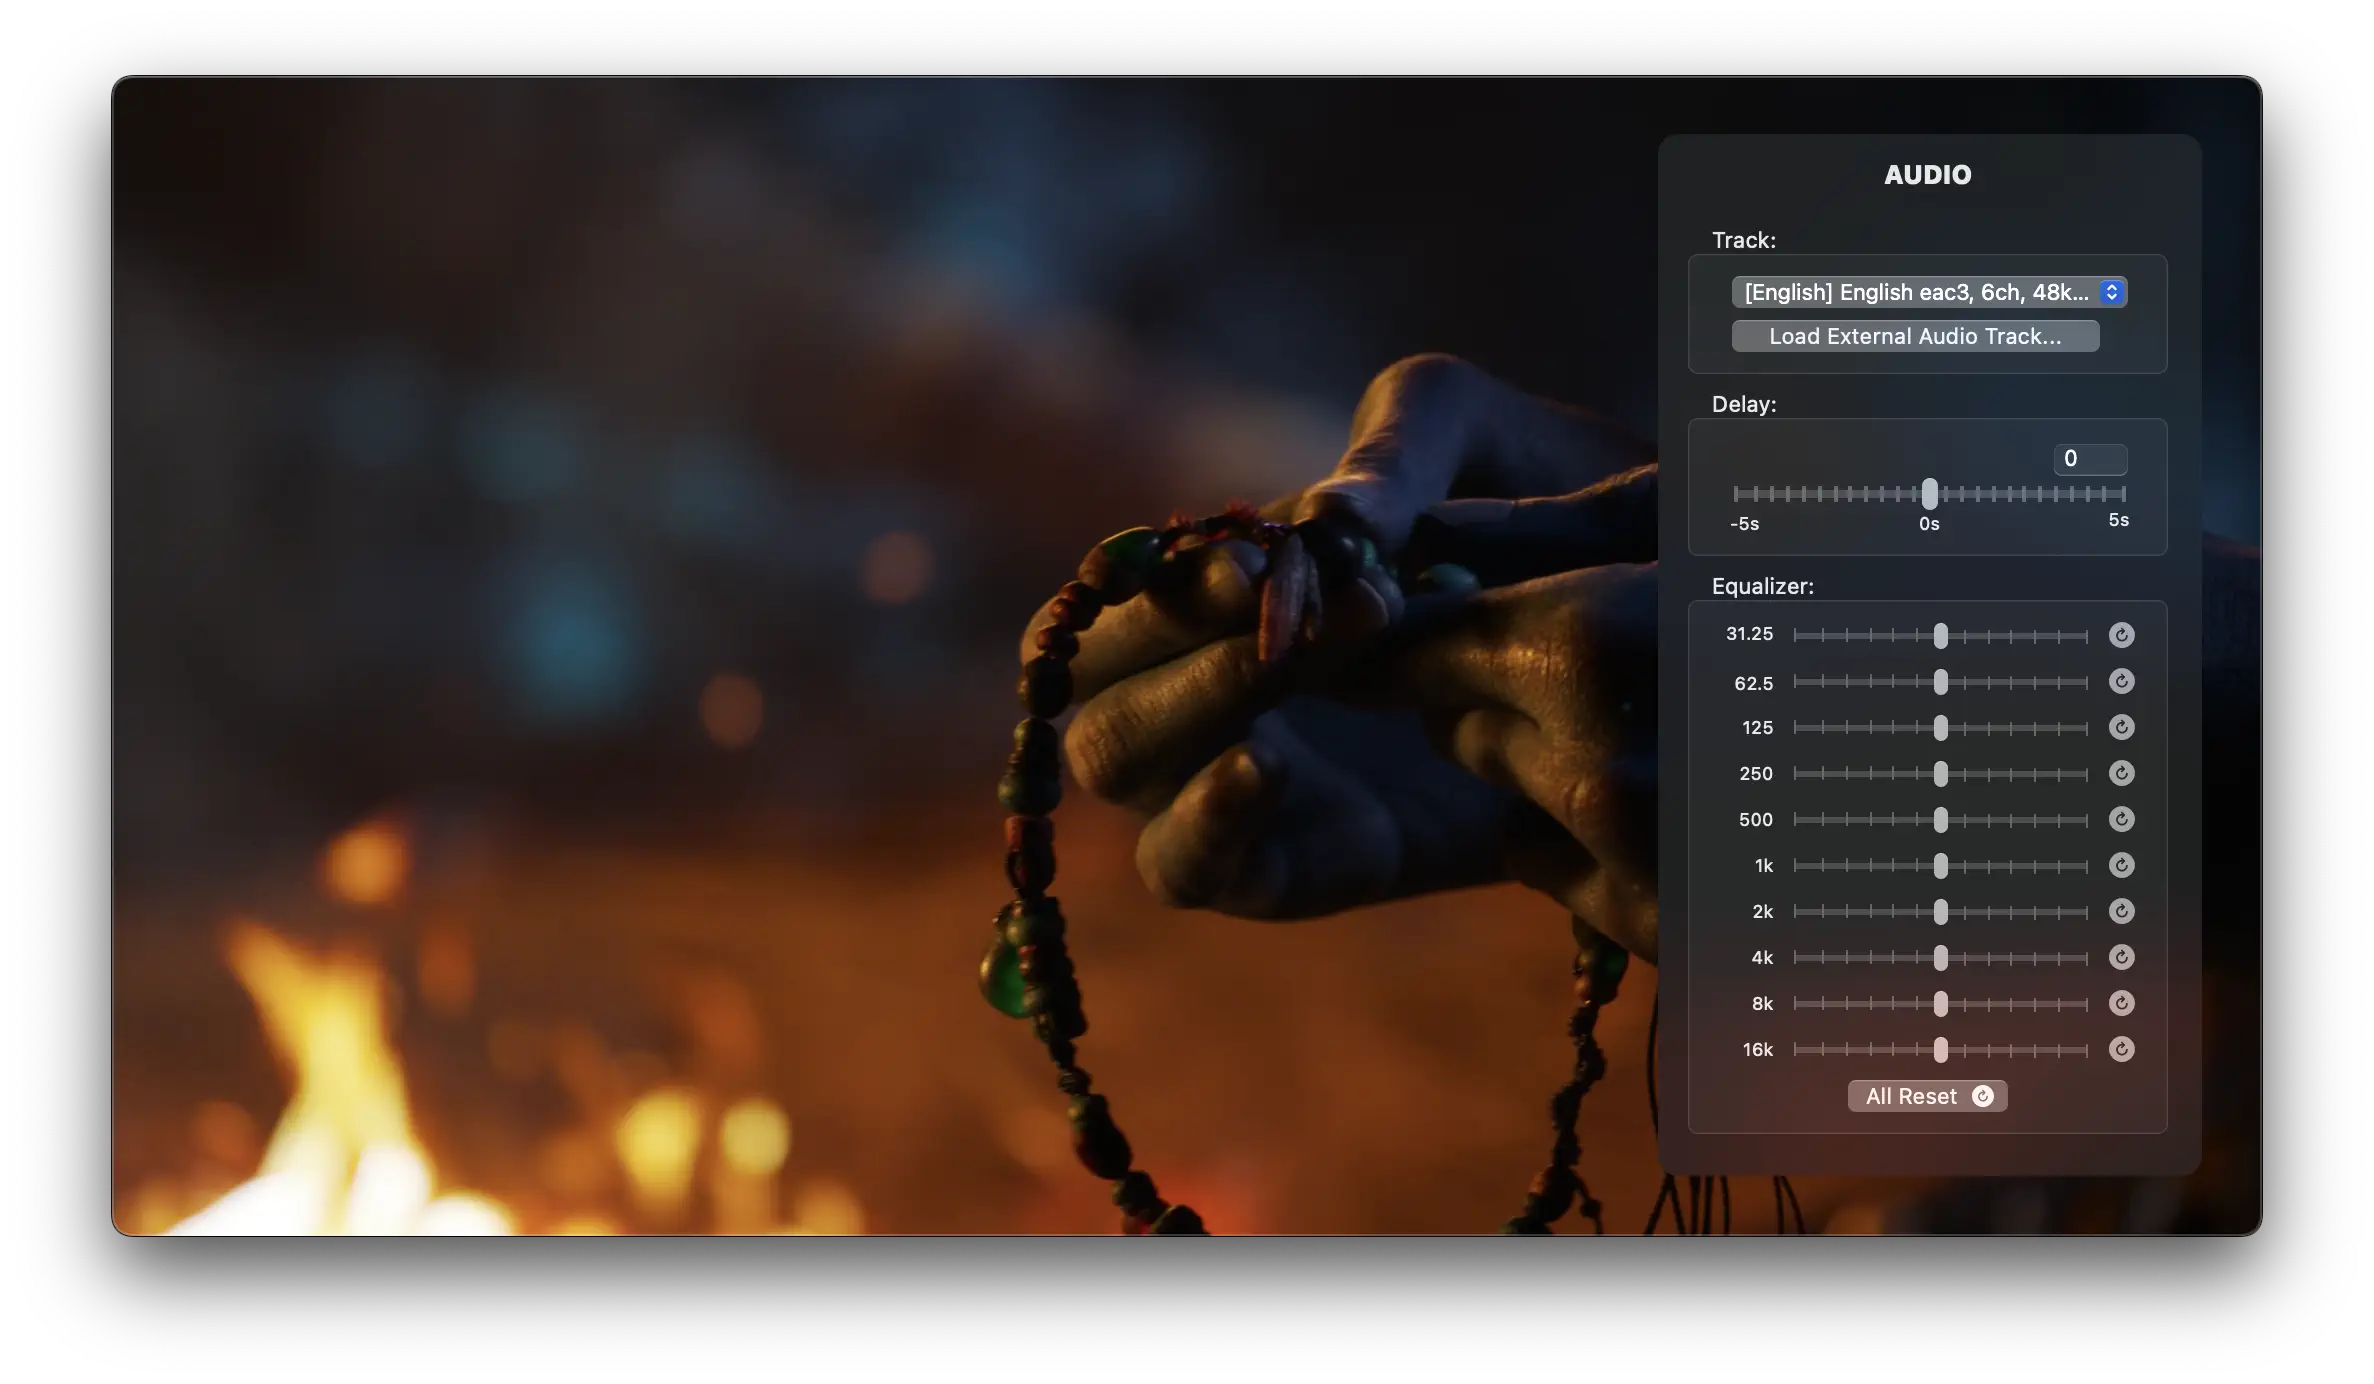
Quick settings make it more convenient to set video, audio, and subtitles. Click the quick settings button in the playback control panel to open the quick settings panel.
1. Set Video Stream: Set video stream, video rotation, playback speed, and video Equalizer.
2. Set Audio Stream: Set audio stream (including loading external audio files), audio delay, and audio Equalizer.
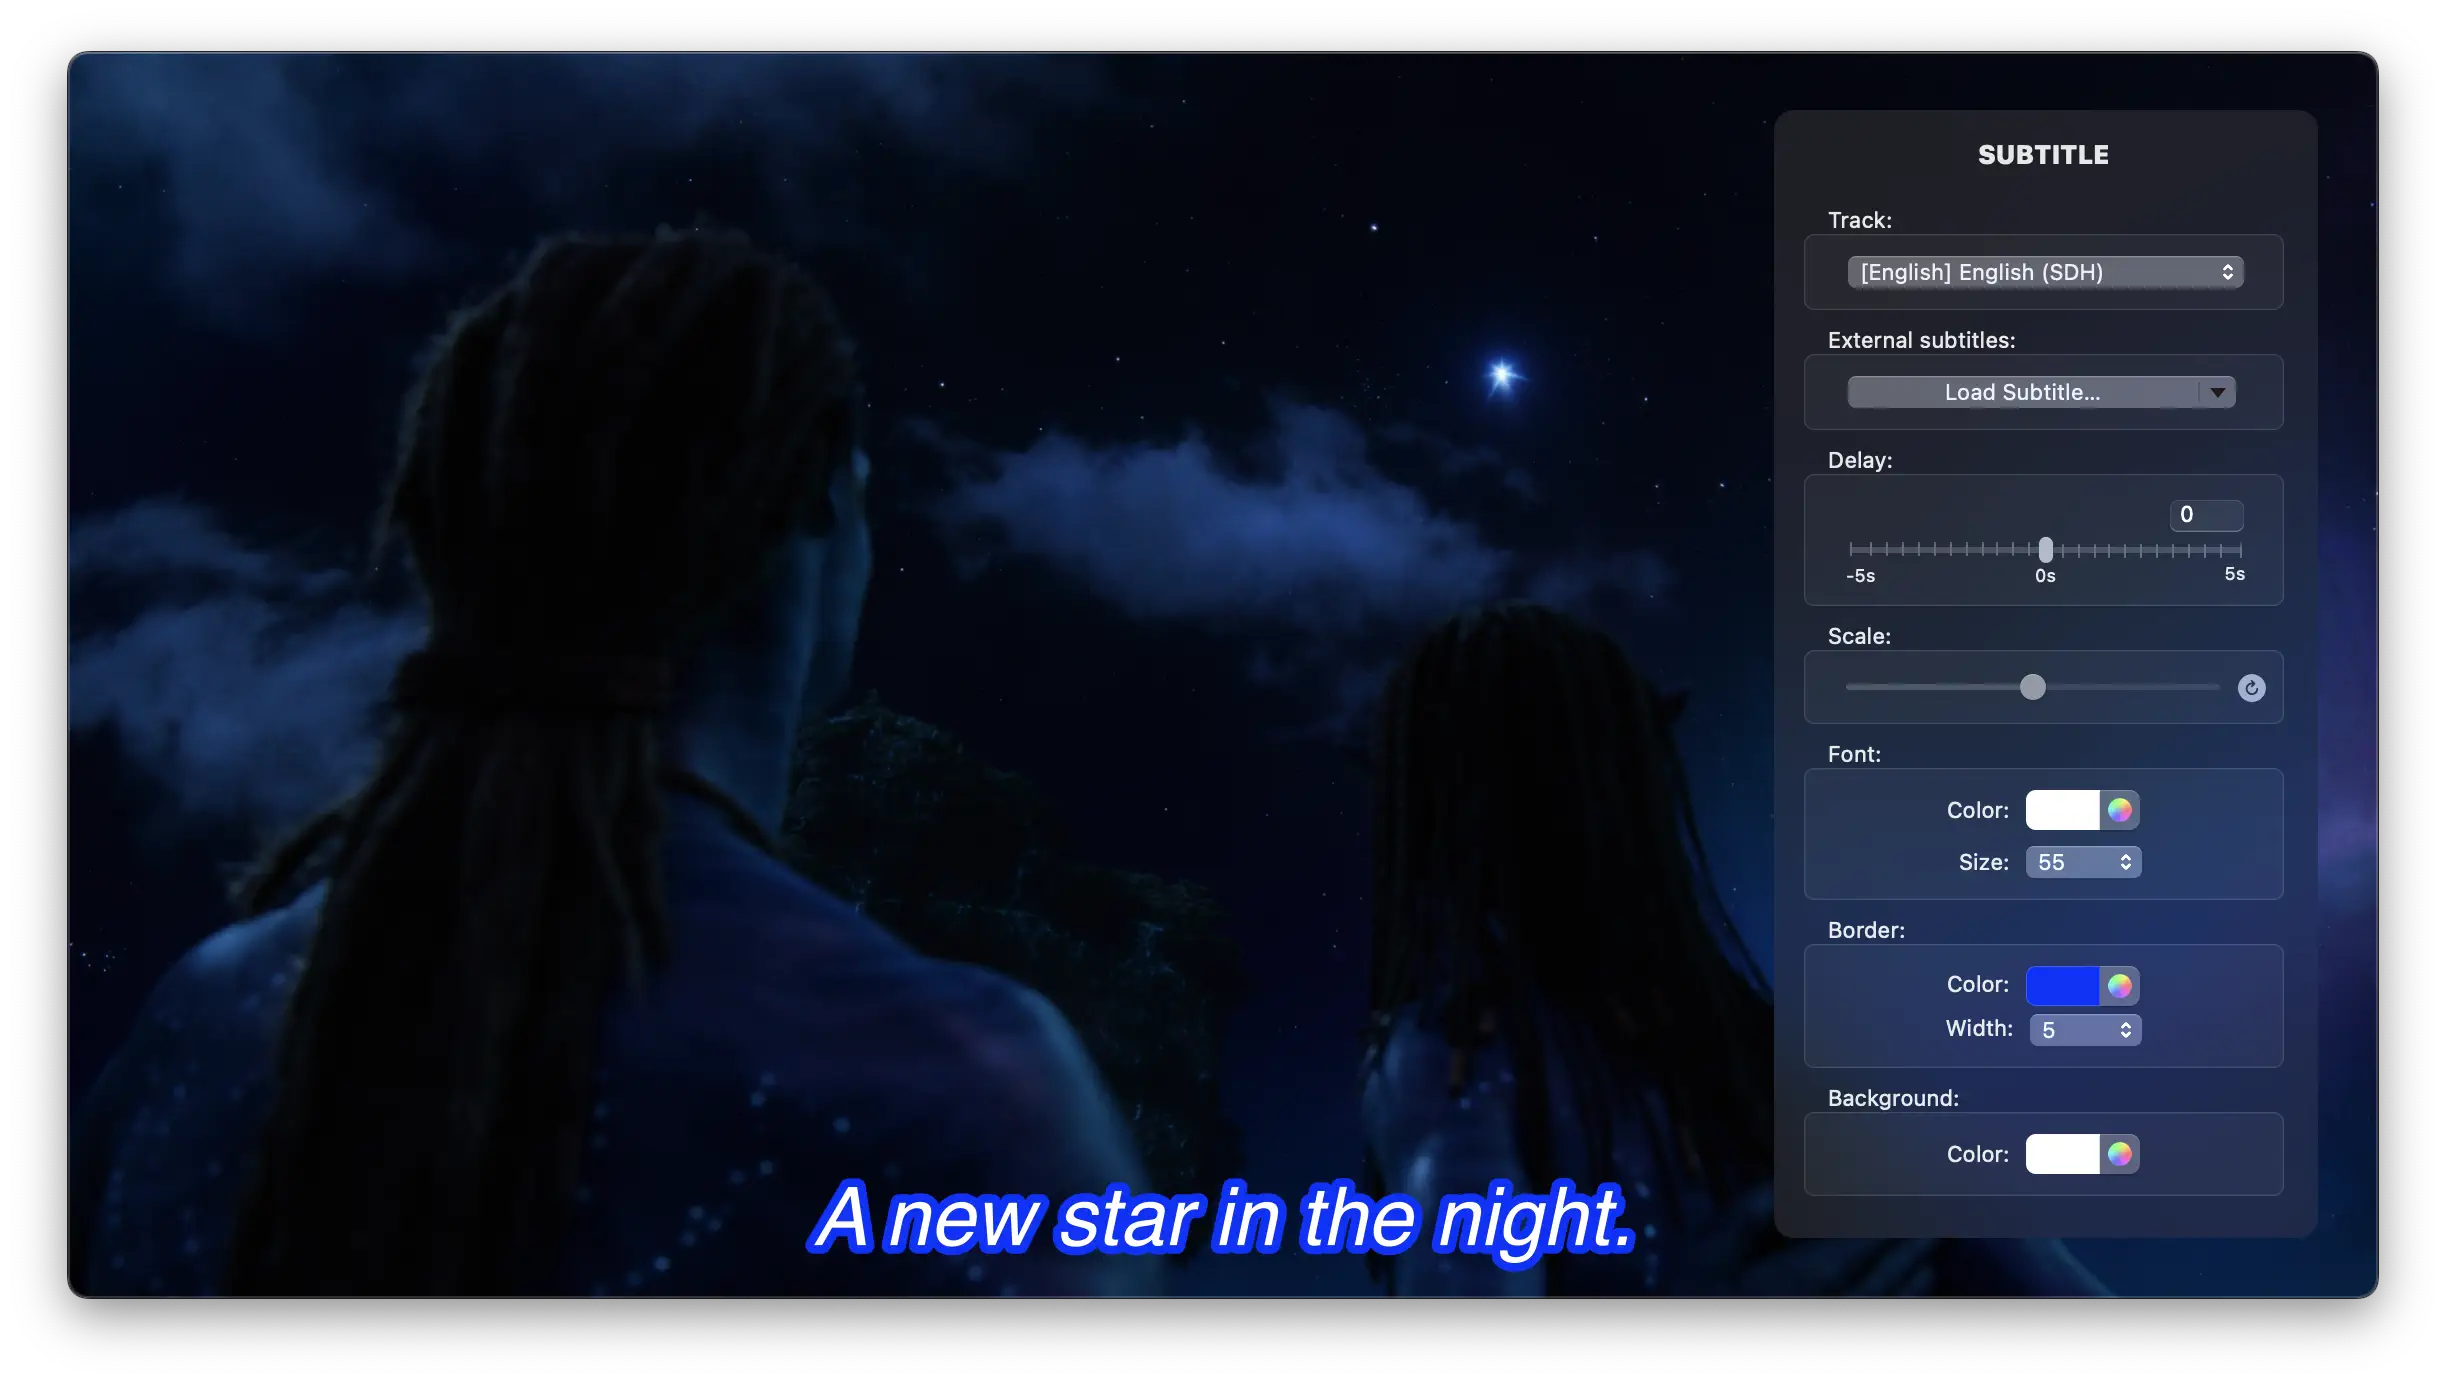
3. Set Subtitle Stream: Set subtitle stream (including loading external subtitle files), subtitle delay, subtitle size, font color and size, subtitle border, and subtitle background color.
Playback Control
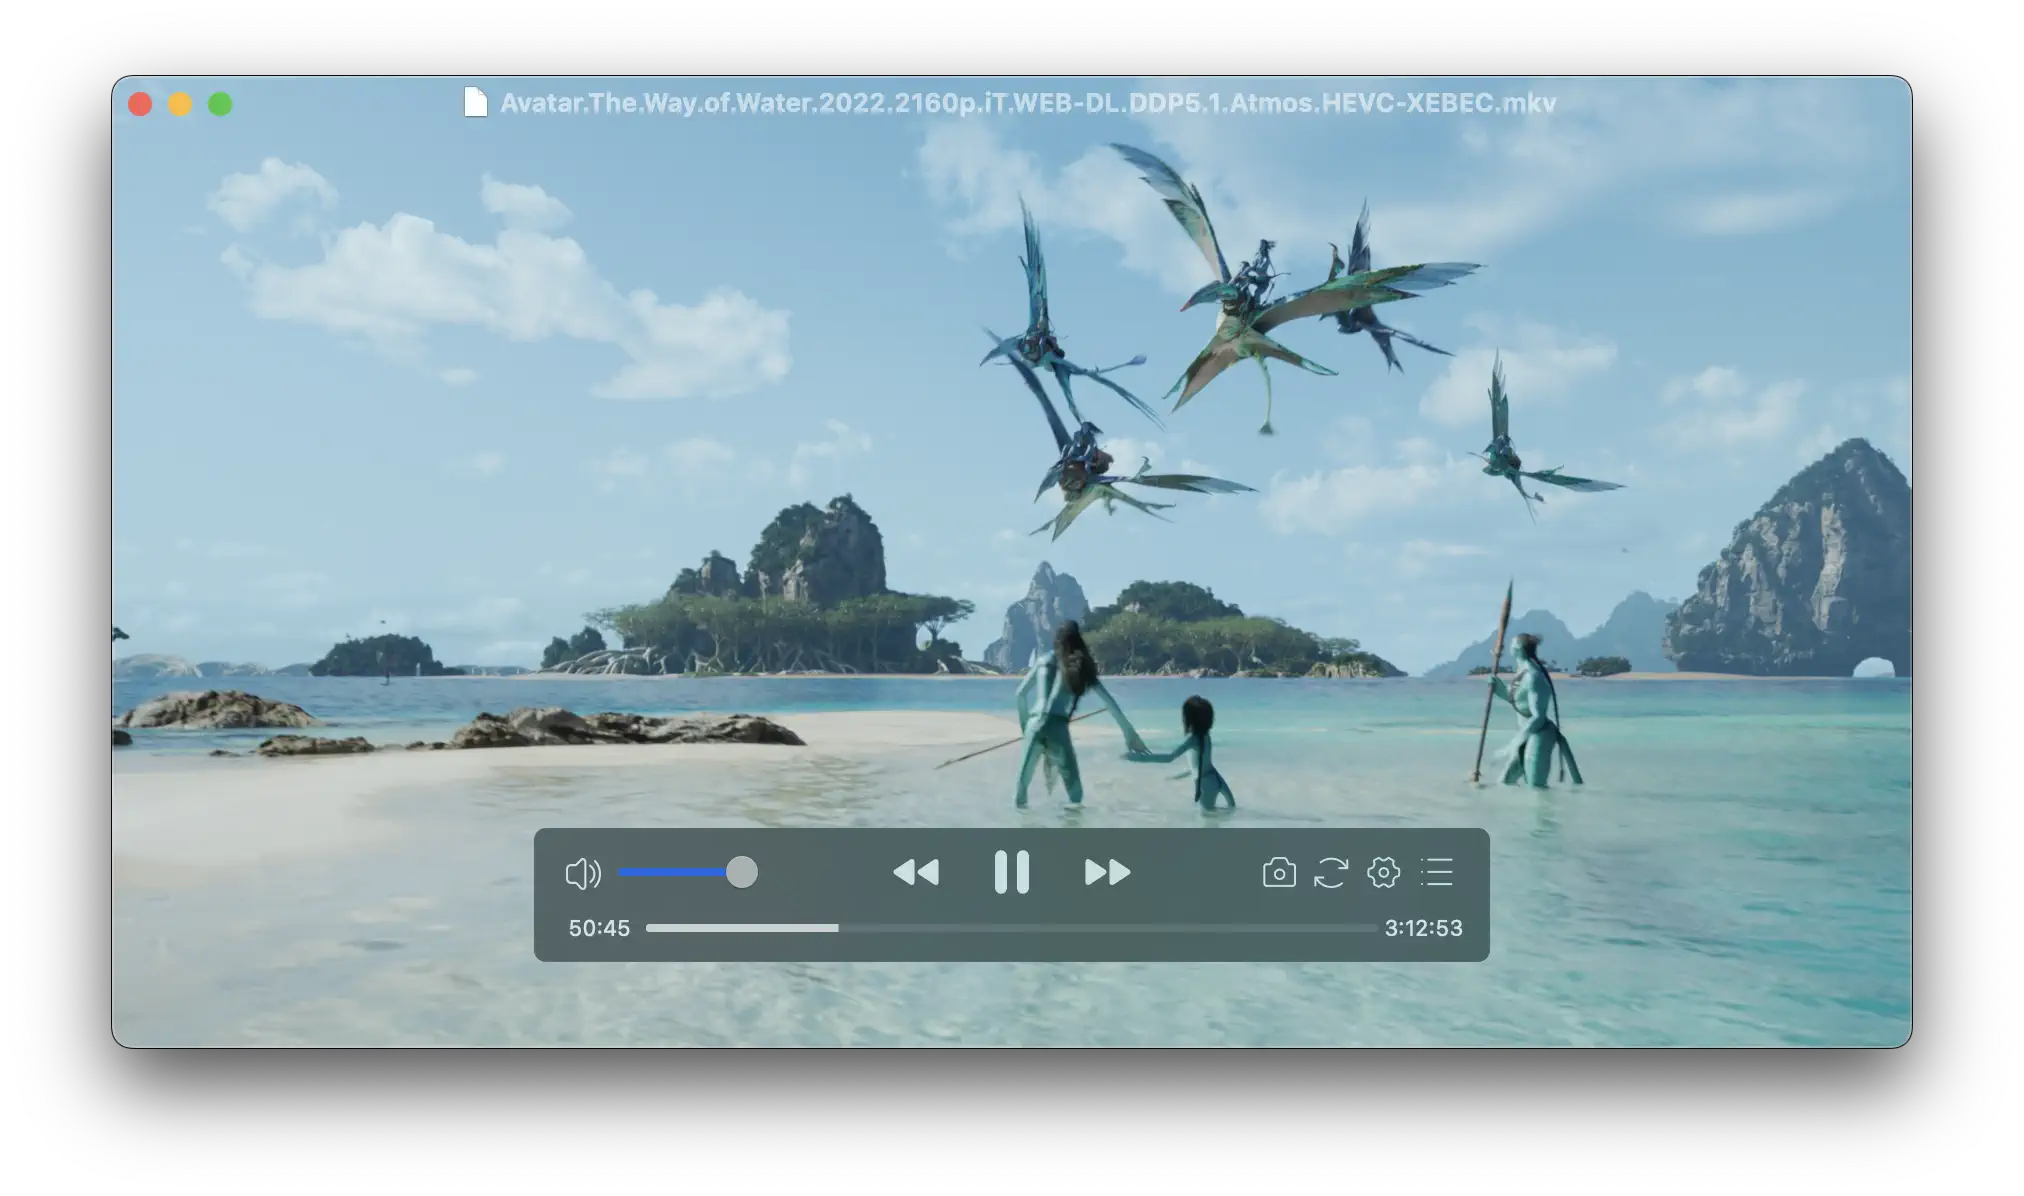
1. The floating playback control panel in the playback window is the most intuitive way to control playback: adjust volume, mute, fast forward/rewind, play/pause, snapshot. It also includes: format conversion, quick settings, playlist.
2. Trackpad is perhaps the most convenient playback control method with convenient multi-finger operations: two-finger drag to control playback progress, two-finger tap to control play/pause, pinch with two fingers to control window zoom, and single-finger double-tap for fullscreen. You can set specific details in the Setting… window.
3. The Playback menu in the menu bar is also a way to control the current playback file, especially when you need to play a certain segment of a video, you can set up “A-B Loop” through the “Playback” menu.
4. VueSpot supports Apple media controls and Apple Remote Support.
Video Control
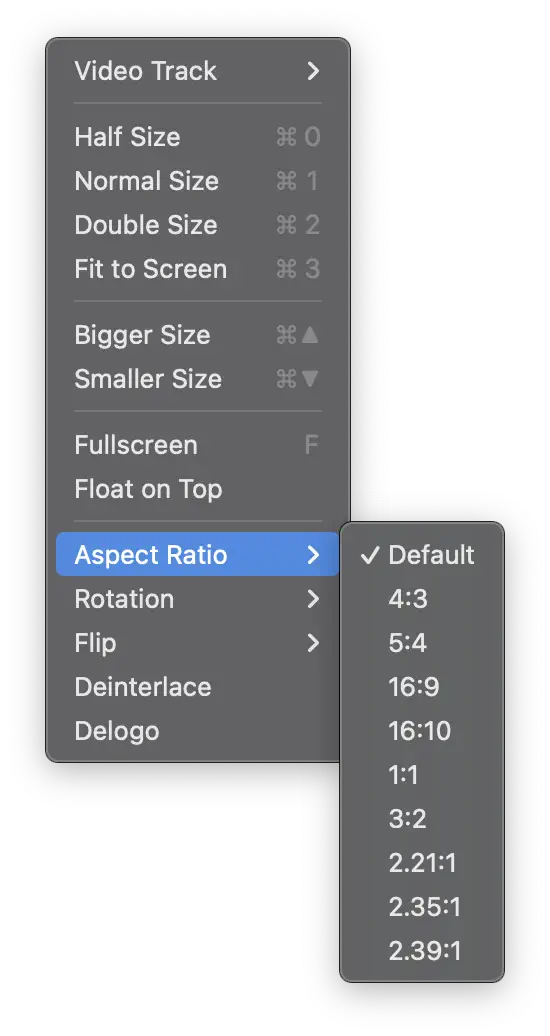
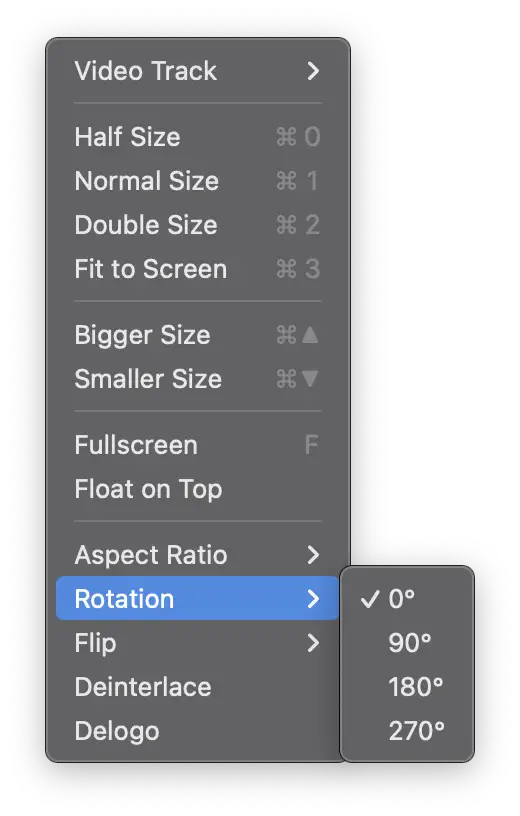
The Video menu is for setting video display.

1. Half Size: Reduce the current playback window by half.
2. Normal Size: Playback window matches the resolution of the video.
3. Double Size: Increase the current playback window to twice the size.
4. Fit to Screen: Match the size of the Screen.
5. Bigger Size: Increase the size of the playback window.
6. Smaller Size: Decrease the size of the playback window.
7. Fullscreen: Enter and exit fullscreen mode.
8. Float on Top: Regardless of which software is the current focus window, the VueSpot playback window will always be on top of all windows.
9. Aspect Ratio: Set aspect ratio of the display, the Default option will maintain the aspect ratio of the original video, other options will set the display aspect ratio according to the corresponding ratio.
10. Rotation: Rotate the video screen to the corresponding angle.
11. Flip: Flip the video horizontally or vertically.
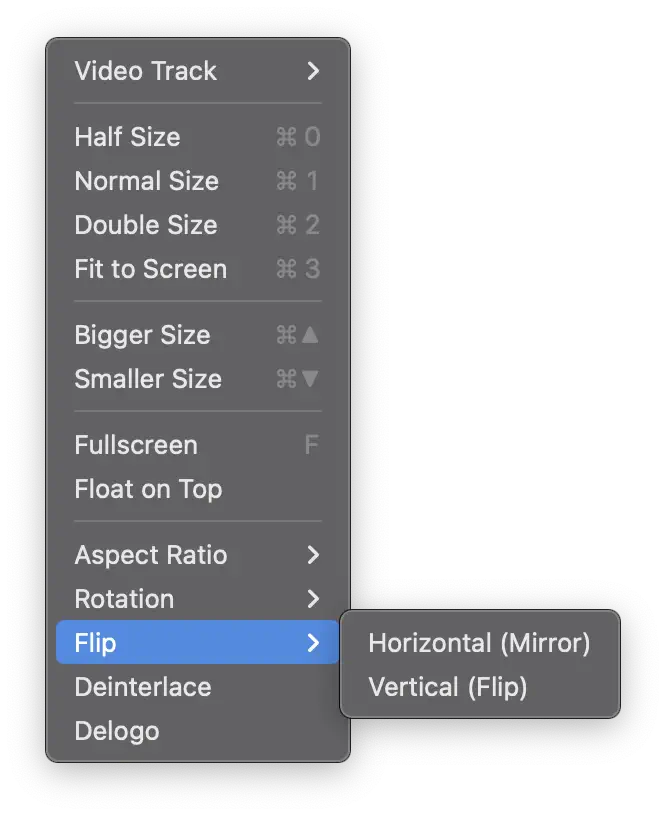
12. Deinterlace: Process interlaced video with deinterlacing.
Audio Control
The Audio menu is for setting the audio stream.
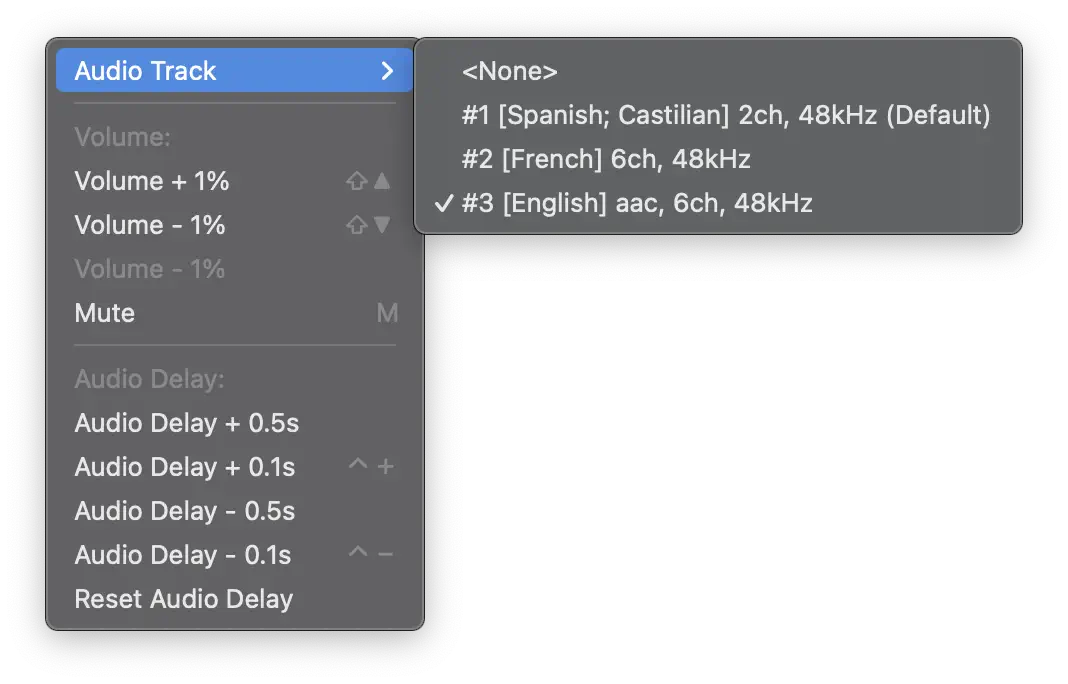
1. Audio Track: Select the audio track, usually to choose the language of playback.
2. Volume: Adjust the volume level.
3. Mute: Mute or unmute the sound.
4. Audio Delay: For videos where the audio is out of sync with the video, setting an audio delay can synchronize the video.
Subtitle Control
The Subtitles menu is for setting subtitle display.
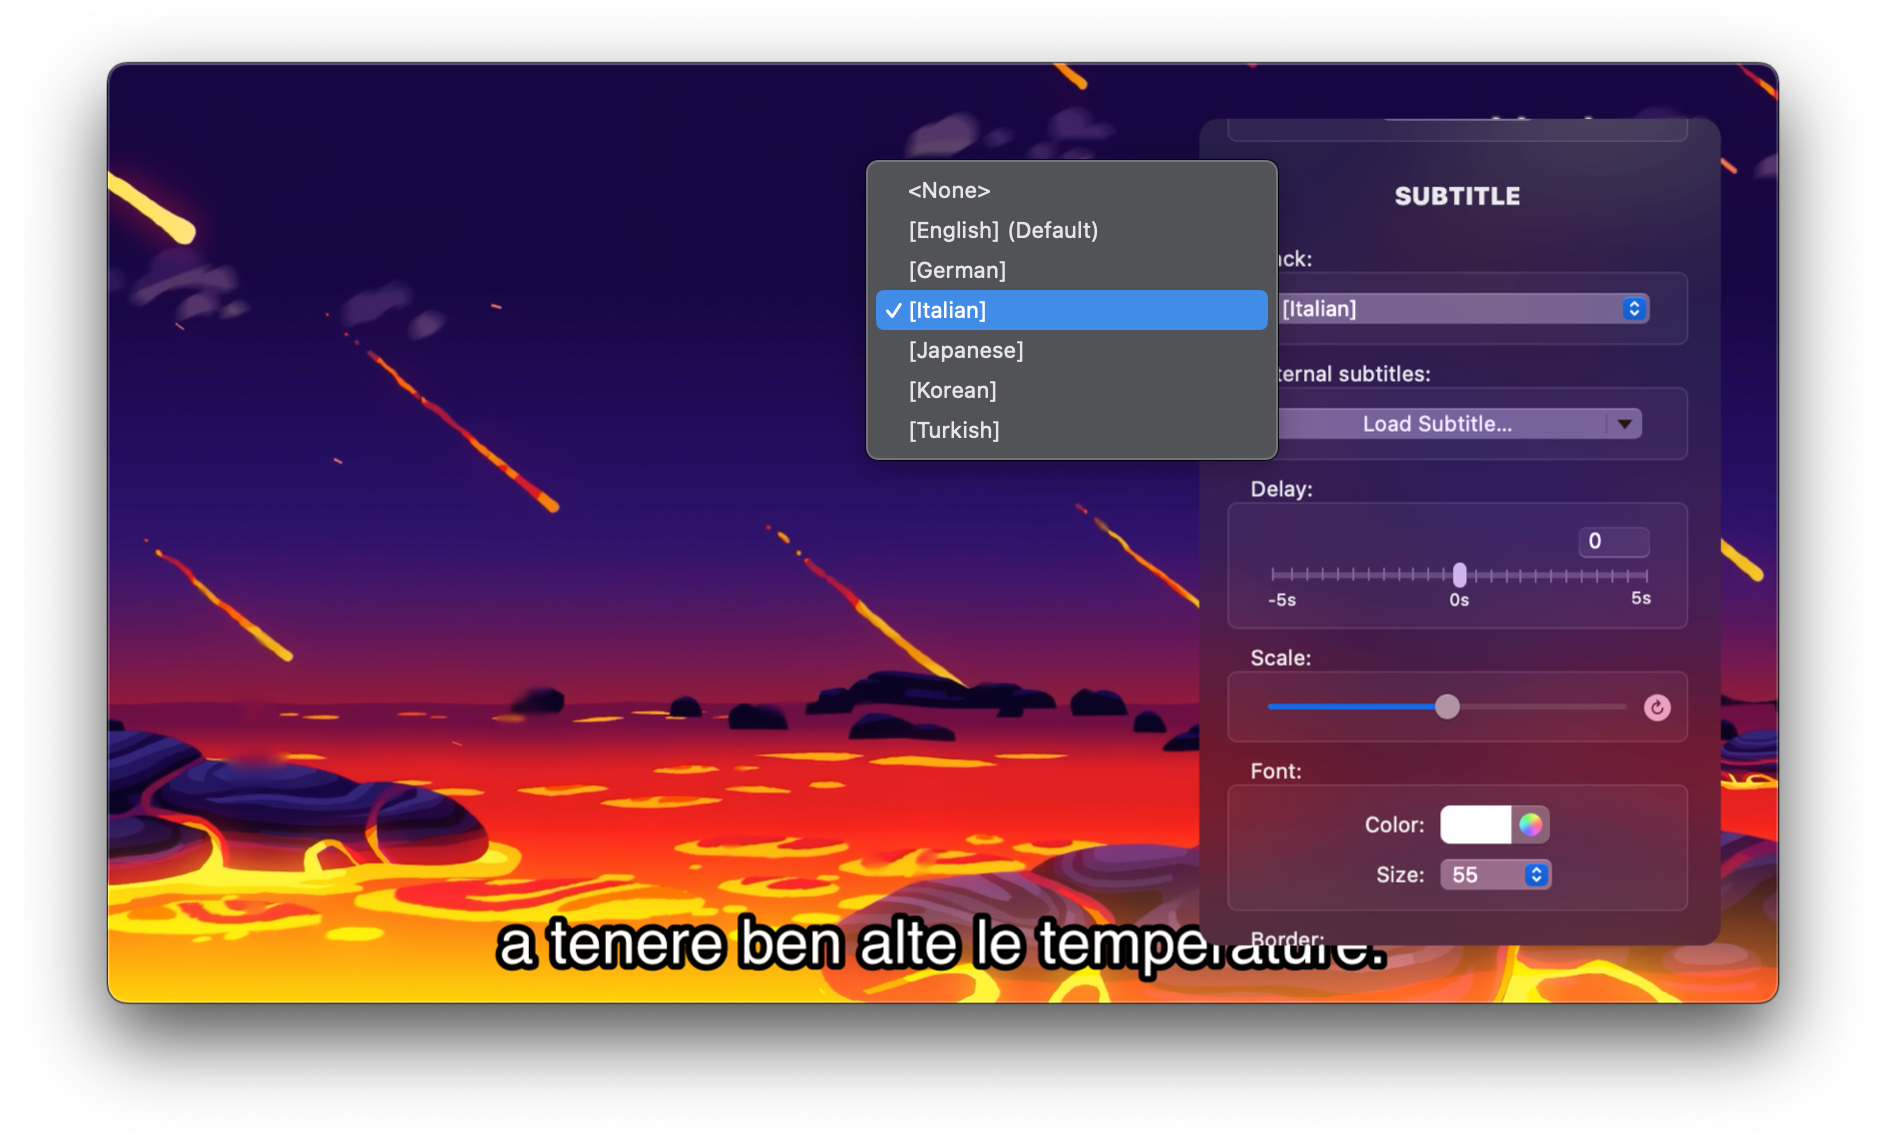
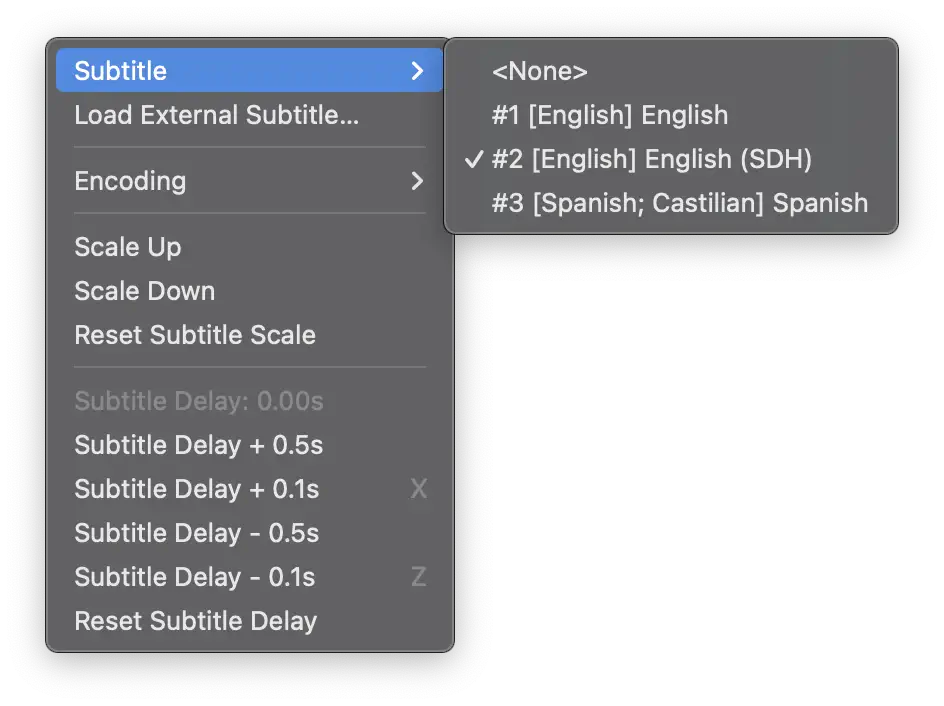
1. Subtitle: Select the built-in subtitle stream.
2. Load External Subtitle…: Load an external subtitle file for display.
3. Encoding: Supports over 40 types of subtitle encoding; it can perfectly display subtitles in any language.
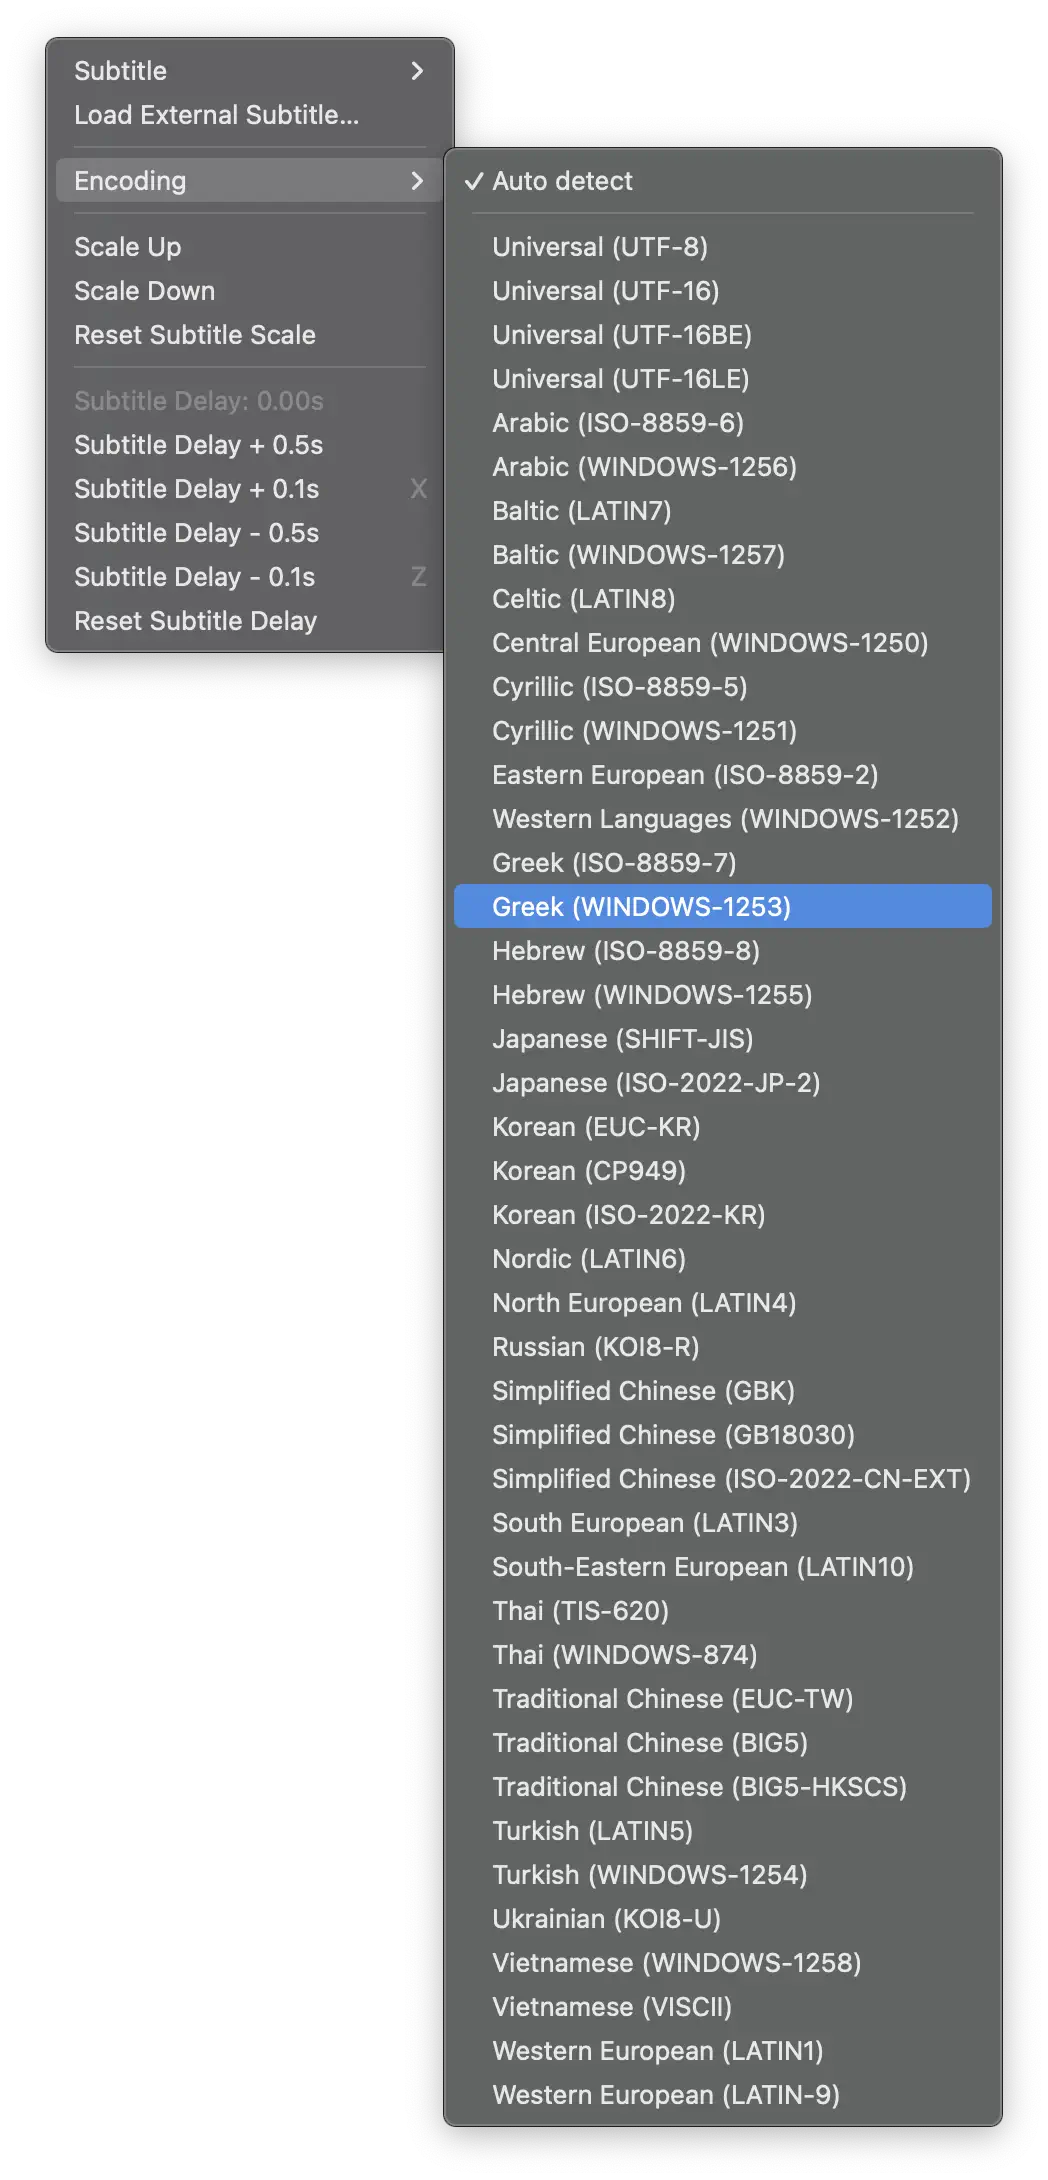
4. Scale Up: Increase font size.
5. Scale Down: Decrease font size.
6. Reset Subtitle Scale: Reset font size.
7. Subtitle Delay + 0.5s: Increase subtitle delay by 0.5s.
8. Subtitle Delay + 0.1s: Increase subtitle delay by 0.1s.
9. Subtitle Delay - 0.5s: Decrease subtitle delay by 0.5s.
10. Subtitle Delay - 0.1s: Decrease subtitle delay by 0.1s.
11. Reset Subtitle Delay: Reset subtitle delay.
Format Conversion
The Convert menu is for audio and video format conversion.
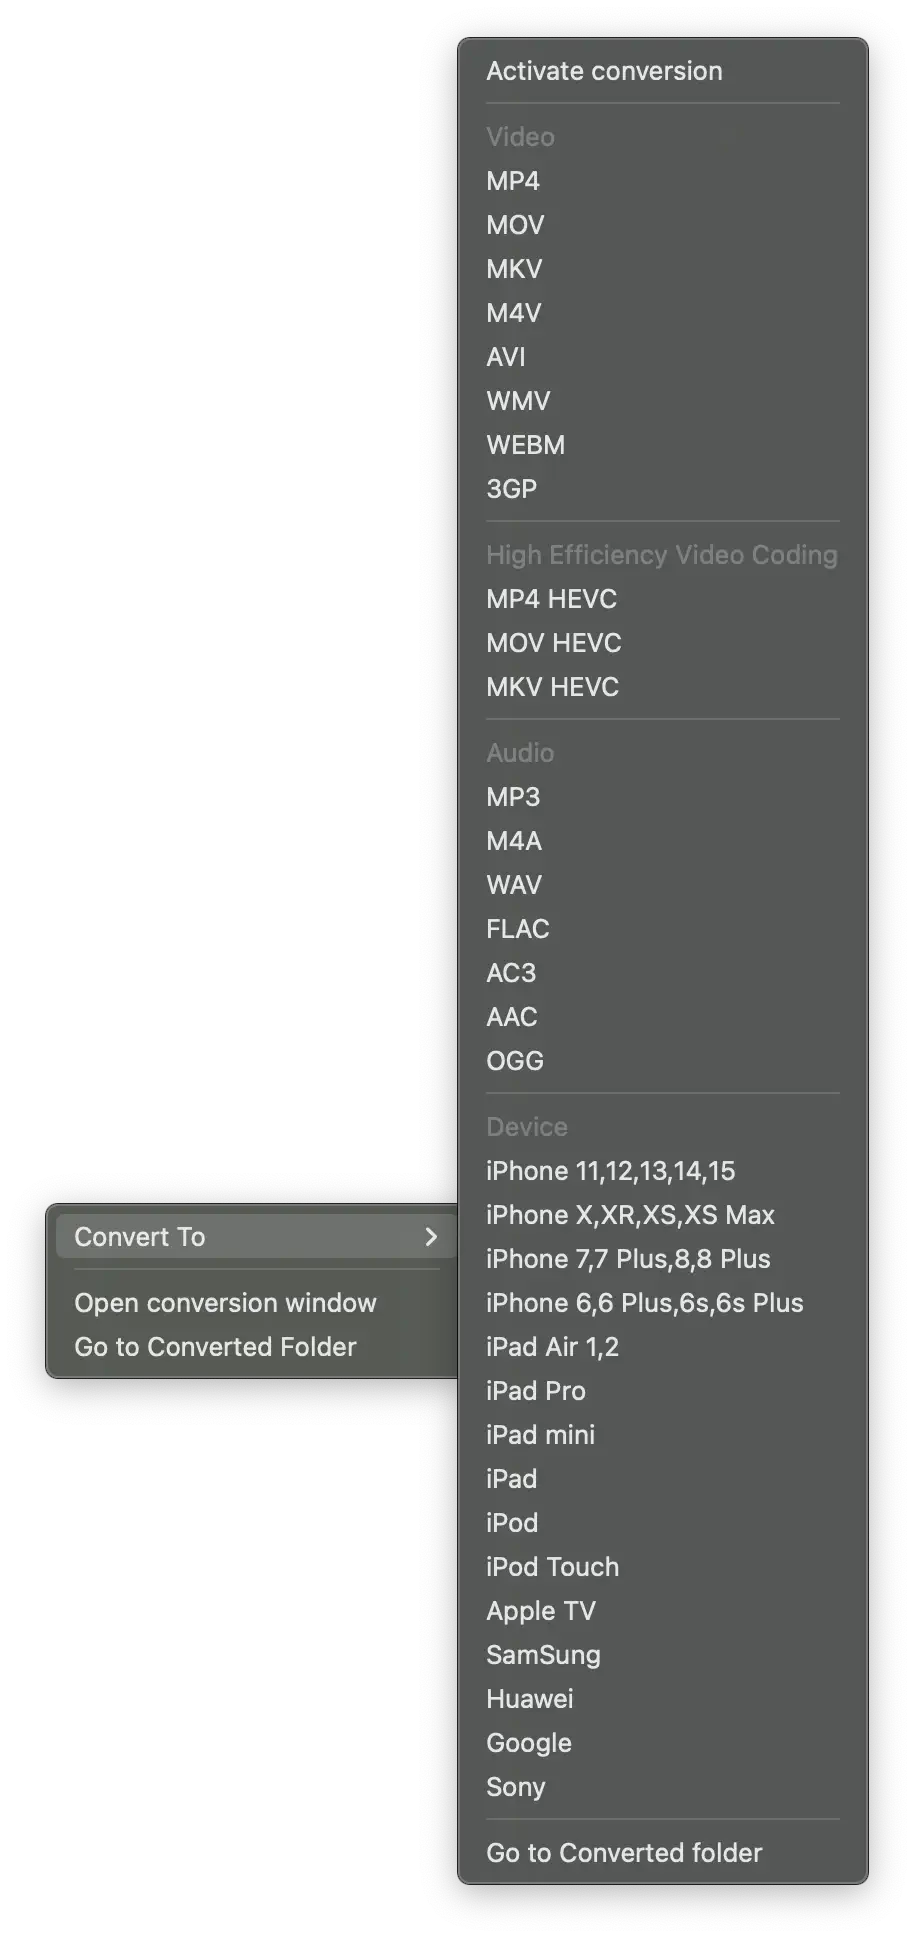
1. Whatever the audio and video format of the file, VueSpot can convert it to mainstream audio and video formats without loss of original quality.
2. Supported export formats mainly include: MP4, MOV, MKV, AVI, WEBM, 3GP.
3. Supported export high-definition formats include: MP4 HEVC, MOV HEVC, MKV HEVC.
4. Supported export audio formats include: MP3, M4A, WAV, FLAC, AC3, AAC, OGG.
5. Supported export devices include: iPhone, iPad, Apple TV, Samsung, Huawei, Google, Sony.
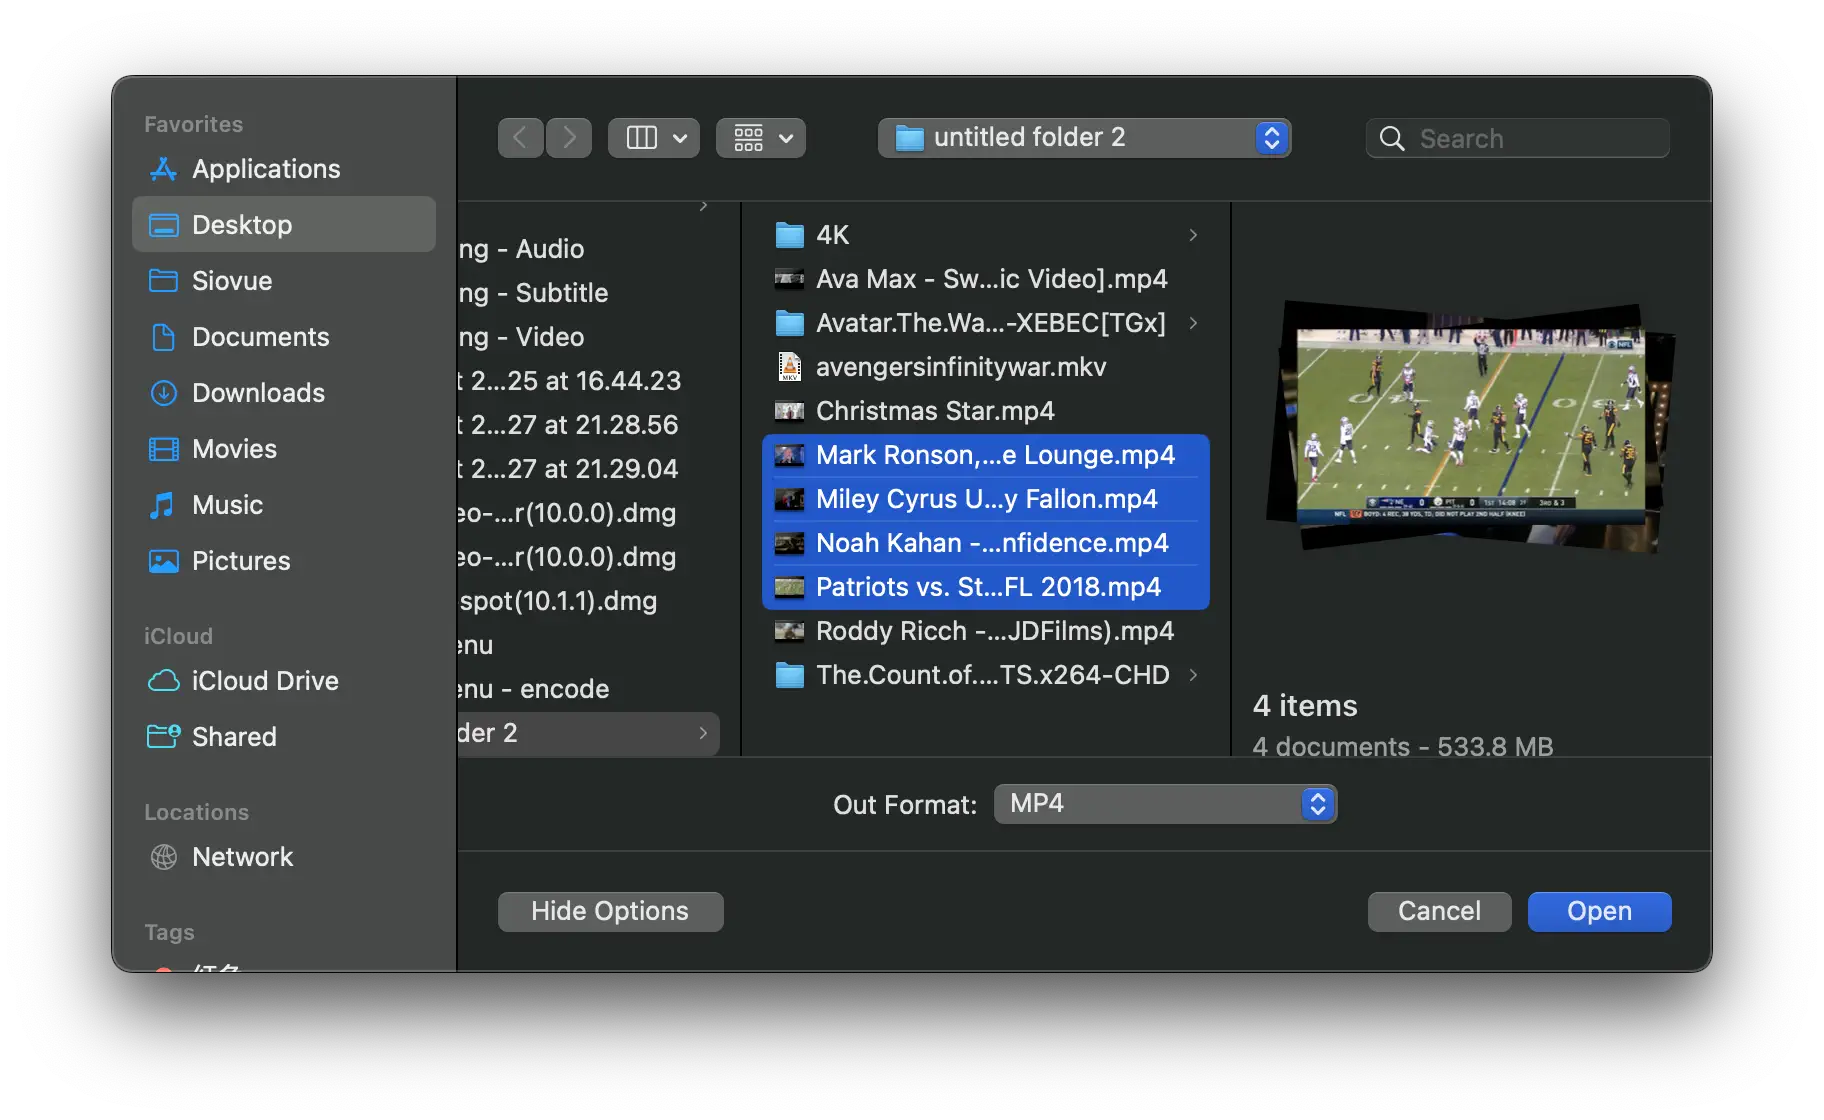
6. Conversion method: Click the add video button -> select the video to be converted -> choose the conversion format -> click the Open button to batch import multiple audio and video for conversion.
Note: The main Convert menu will only affect the currently playing video.
Activate VueSpot
You need to have a Siovue ID, which is only used to help you activate the product, receive better customer support, and offer discounts on other Siovue products.
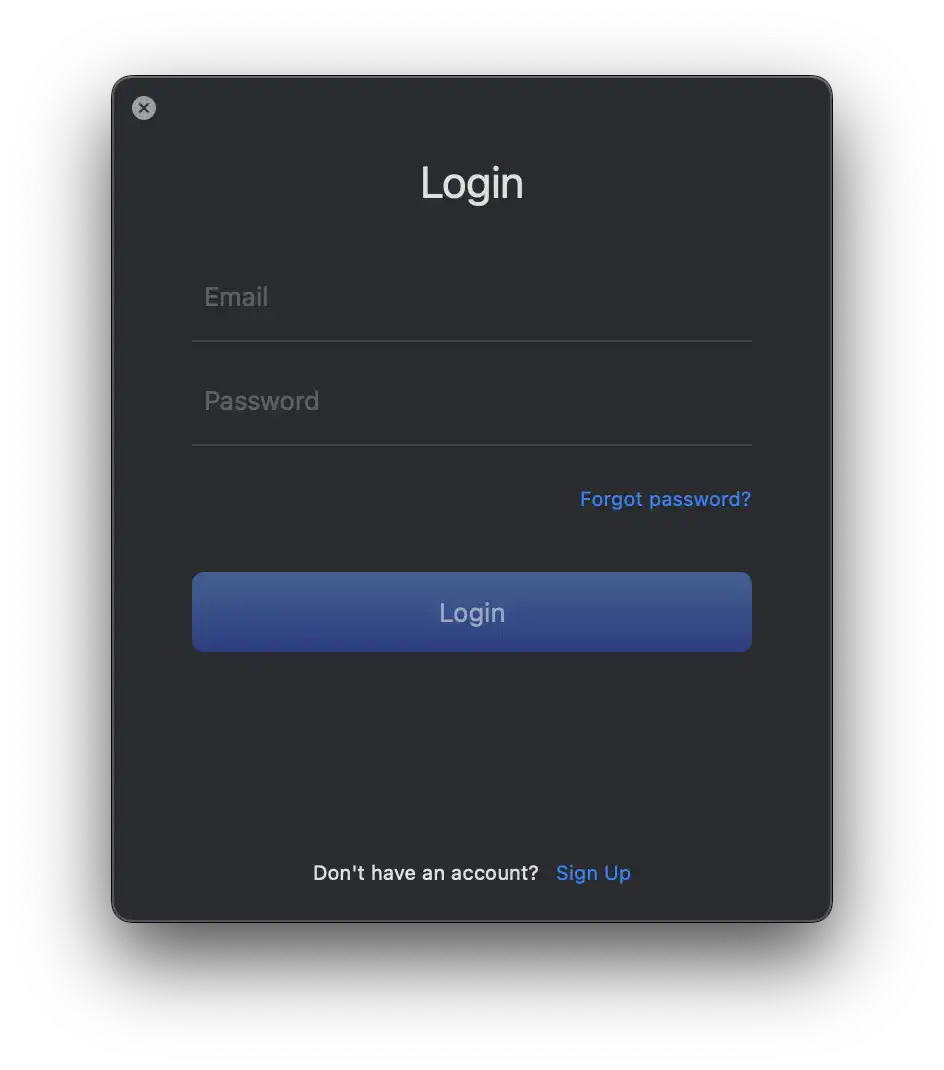
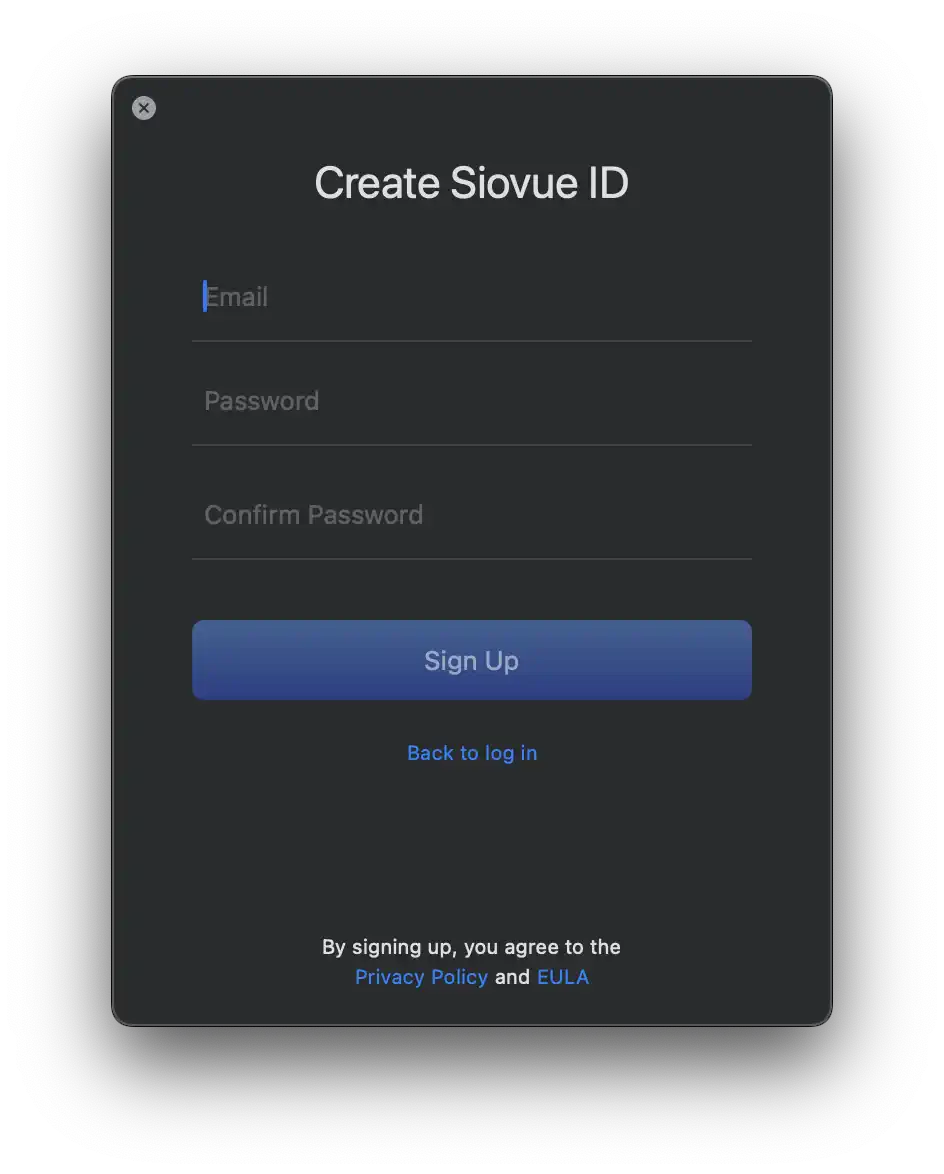
1. If you do not have a Siovue ID yet, click the “Sign Up” button on the Login interface, switch to the “Create Siovue ID” interface to register.
2. Click on the “Activate conversion” menu item in the “Convert” menu, or click the “purchase” button in the conversion window.
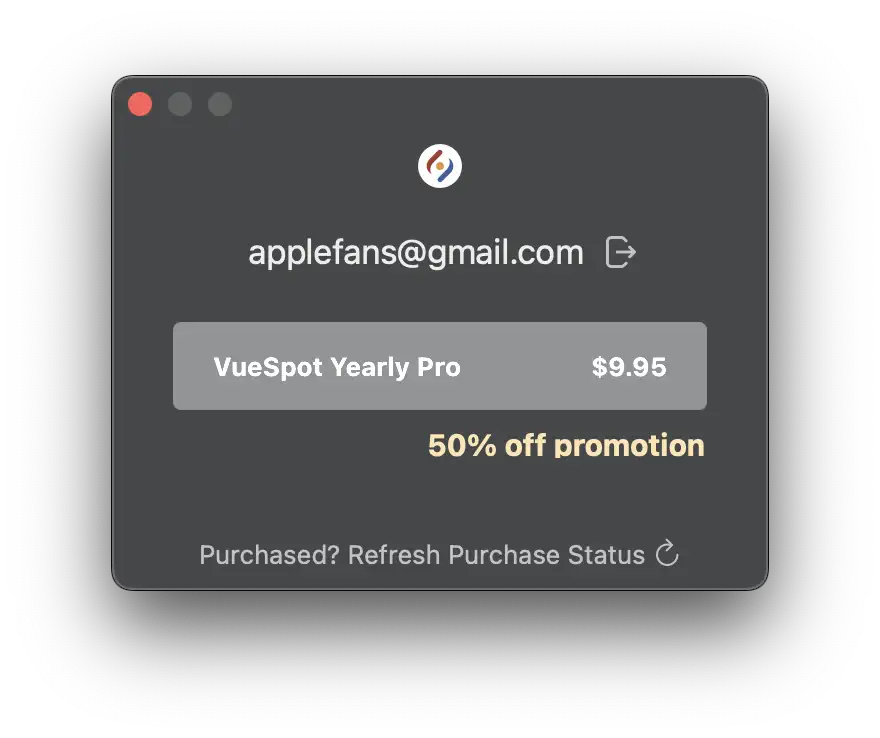
3. Click the “purchase” button in the pop-up window.
4. Complete the purchase to finish activation. (If it’s still not activated after purchase, click the “refresh status” button.)
Settings
The Setting window offers a rich array of features and options, allowing you to fully customize VueSpot.
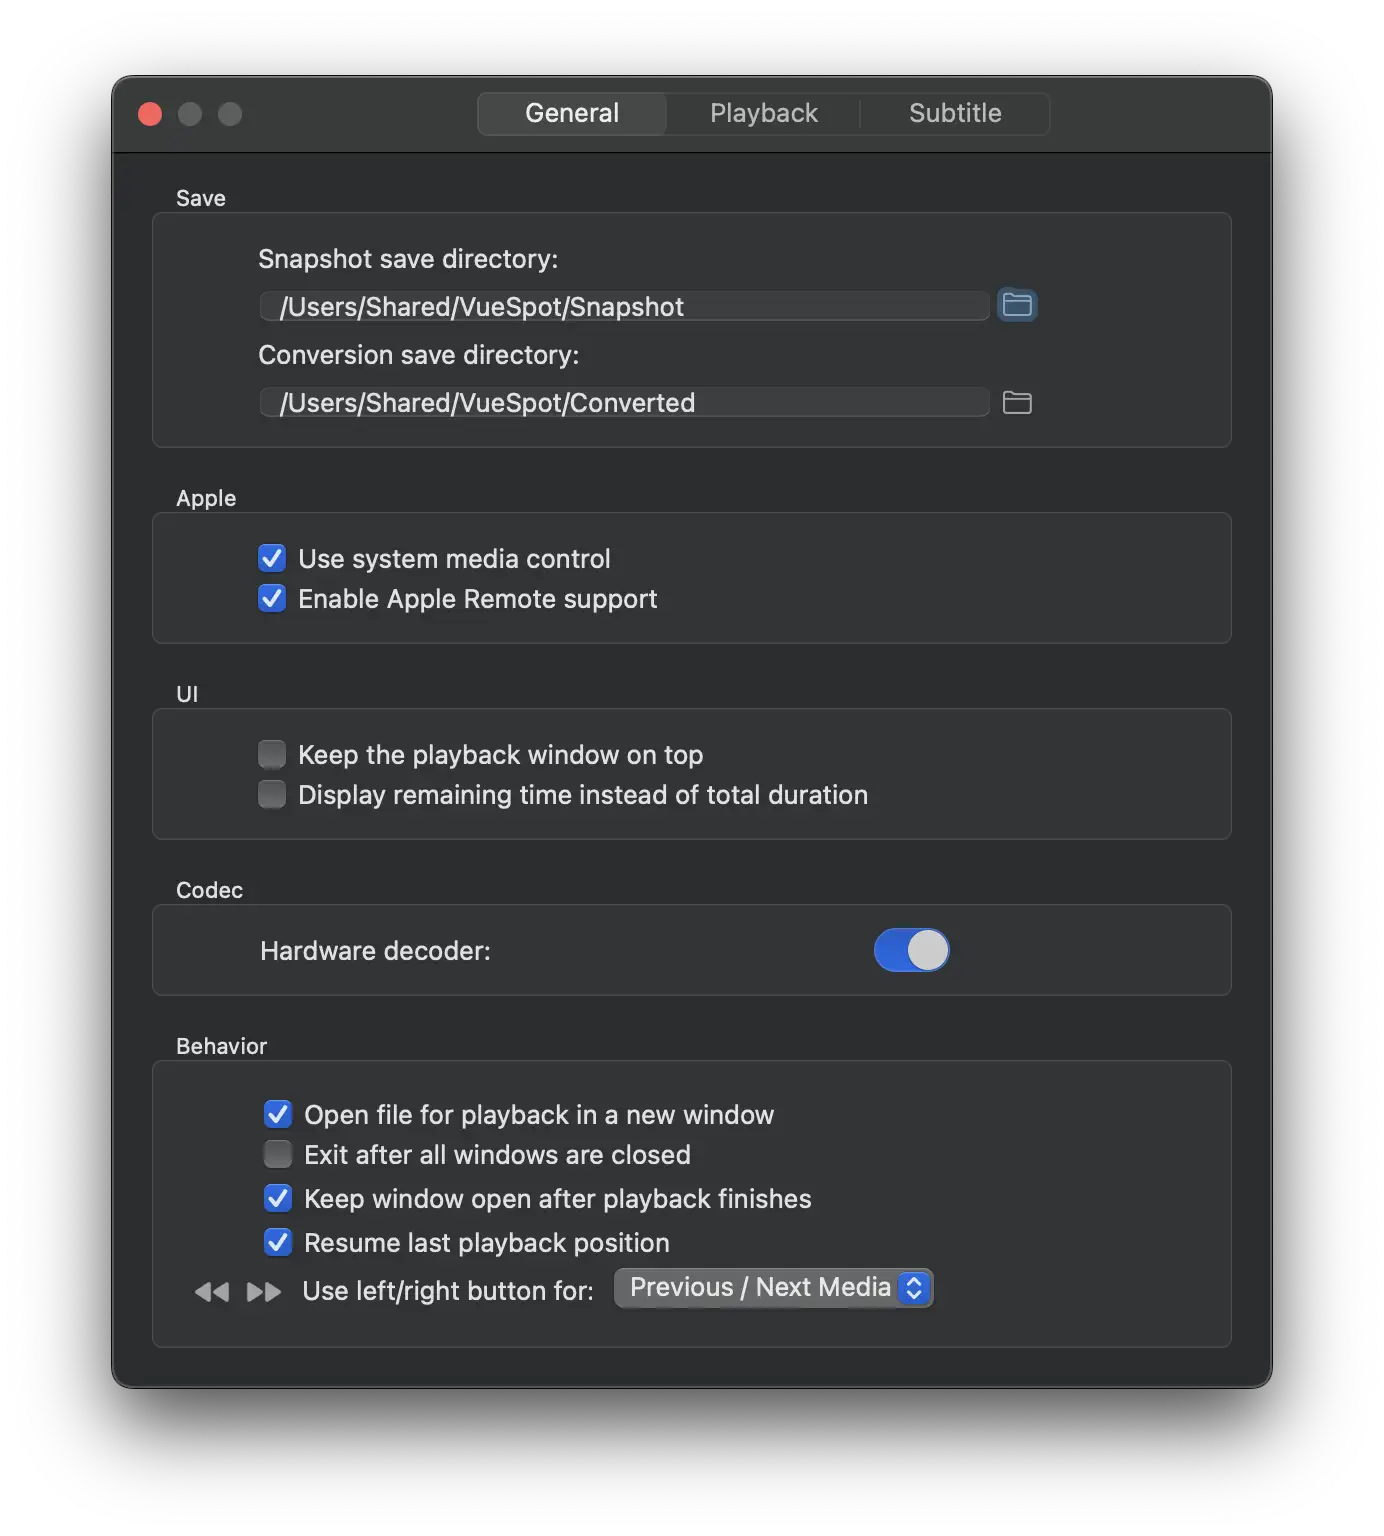
1. Set the folders for saving Snapshots and Conversion.
2. Set whether to enable Apple media control and Apple Remote support.
3. Set interface behavior.
4. Set whether to enable hardware encoding.
5. Set player behavior.

6. Set mouse behavior.
7. Set Trackpad behavior.
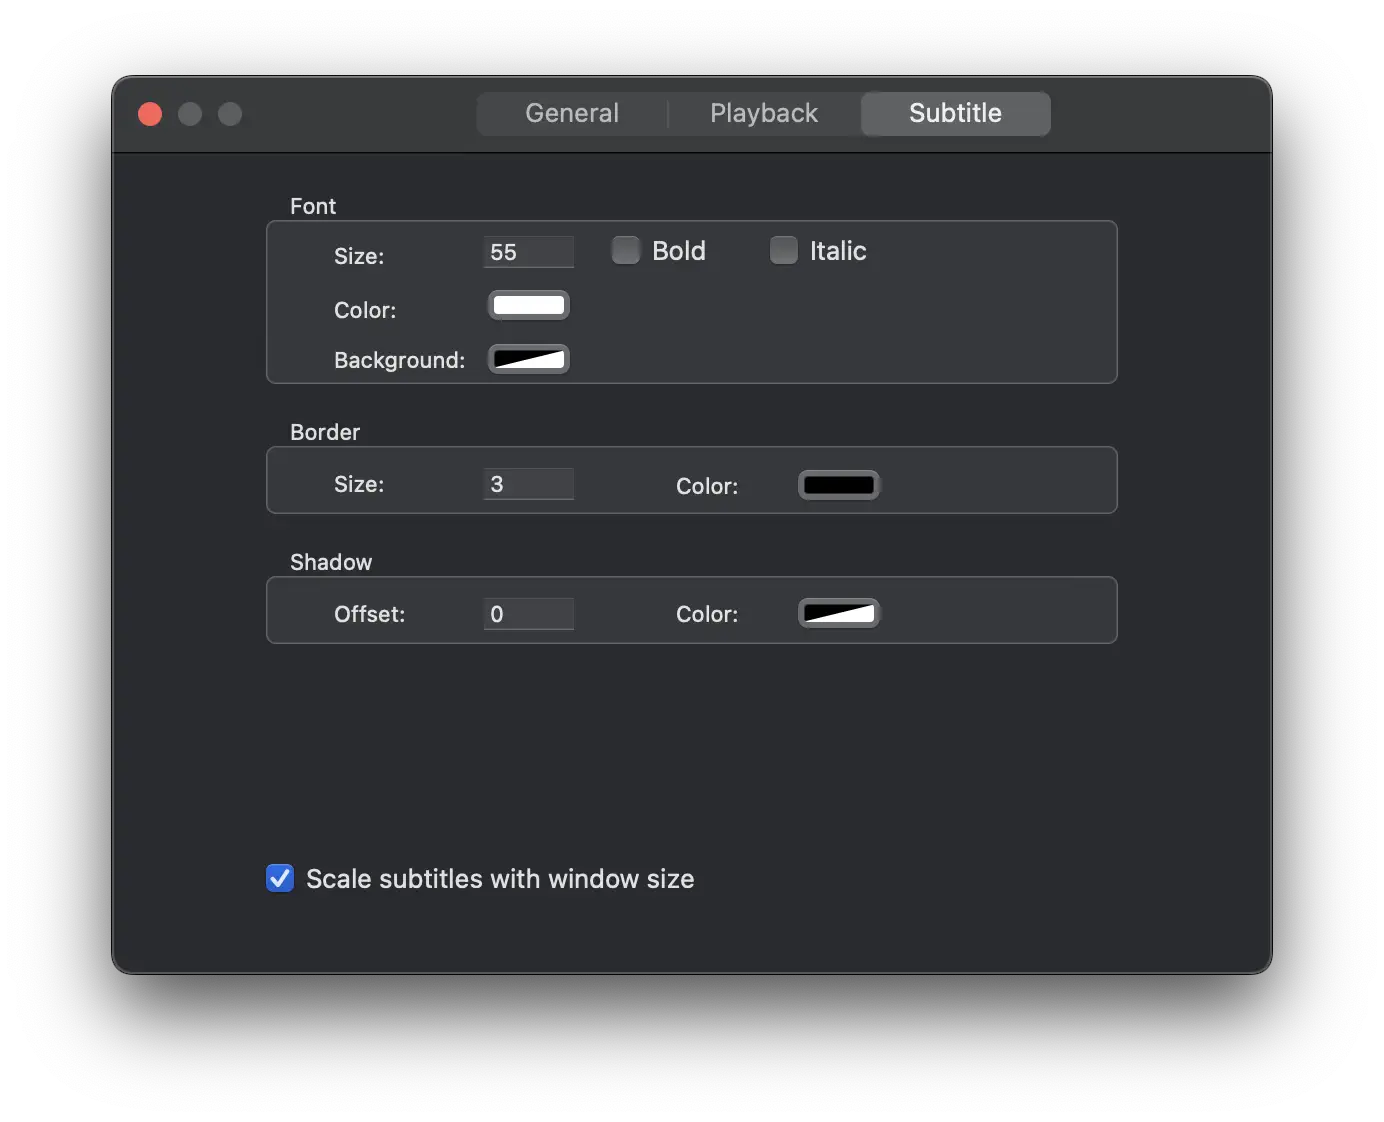
8. Set font size, color, and background color.
9. Set font border width and color.
10. Set font shadow.
11. Enable or disable automatic resizing of subtitles with the playback window.